Linux Based Streaming Media Player - Mark II
Back in the mid 00's, I tried to make a standalone Media player, the goal being to have a quiet unobtrusive PC that can play compressed media (such as MP3 CDs) while looking like any other piece of Hi-Fi equipment. For reasons detailed at the top of the Mark I article, this project was never completed despite a lot of work put into it. While I thought I would make a second attempt shortly after that failure, the reality is that I am only now considering it in 2018, 11 years after the original failed.
Many reasons for not doing it come to mind, but one reason that came to mind for trying the project again was the introduction of the Raspberry Pi. The first SBC that is easily available to retail users, which is is silent by design, draws very little power, and comes with proper GPIO ports (no more interfacing with a PC parallel port). Also I was in a position where my HiFi was no longer near enough to my workstation for me to hook them up together, so a standalone media player would once again be useful.
Also while moving house I found my old Nokia Mediamaster digibox. UK residents will remember these when the government was trying to get everyone to switch to digital TV broadcasts so they could auction off the analogue TV channels for big money. An organisation called "onDigital" gave people these Nokia digital set-top boxes for free so that people could still use their old TVs. We got one and it all worked well when they switched off the analogue signals.
However a couple of years later we got to experience a new joy of digital TV: Forced obsolescence. An update to the digital TV signals rendered all these old boxes unusable. Despite functioning perfectly, they were now nothing more than doorstops. As a result many of them ended up in the trash (and everyone had to buy new digital receivers), while our one got relegated to the attic where it was forgotten about.
Fast forward a few years, and I came across it again, more or less pristine but useless. However it was designed to fit in a living room, so it fit the bill and I decided to use that as my case for the new media centre.
The world has changed since my last attempt at this project. For one thing with the improvement in home networking and internet speeds, mp3CDs are no longer that popular. I don't have many of them anymore and those I do have are mostly for the car CD player. I store all my music on my server and I listen to online radio stations, so the goal of this project is primarily to handle streaming media from the network, with CD playing being the secondary task.
The Plan
The initial plan for this project is as follows (in order of importance):
- To give good quality audio output
- To be easy to use to play audio streams from my collection or the internet
- To be silent in operation and not draw a lot of power
- To not look out of place in the living room next to the Hi-Fi
- Have a remote interface for control
- Support playing of audio CDs and data CDs with compressed audio on them
Prototyping
With that plan in mind I go to work. I removed the innards of the Nokia, put in a 2 line VFD (temporarily duct taped to the front panel), the raspberry pi and installed Rasbpian on it. I had an old USB "Sound Blaster" sound card in my junk box, so that got repurposed to provide some higher quality audio output than the built in pi's audio. Truth be told it all seemed so simple compared to the "Mark I" that I didn't even consider a write up and I did not take photos.
After all there was so much space in the case, the pi was so small and the VFD was plug-and-play (being serial based it only needed three wires and me to configure the tty attributes for it to work) it didn't feel like a write up would contribute much.
However with time and testing, some flaws came about in the prototype which needed to be remedied, specifically:
- It had no interface, I would use ncmpc on my workstation or laptop to control it
- The Raspberry pi would randomly reset, especially when trying to update the DB
- Sometimes the Raspberry pi would stutter while playing, and would become unresponsive to commands
The issue of not having an interface was actually not solved by me. I found out that there was an excellent Android application, called "mpdDroid" that allowed me to make use of a smartphone to control the player. I had an old Android phone that was no longer in use, so that was repurposed as the remote control. This also meant that I did not have to develop my own electronic interface (I had considered interfacing some buttons for basic control, and deploying LIRC for remote control).
With mpdroid, the prototype actually became very useful, and I started using it more and more. As such I considered the idea worth doing properly and as a result the project (and this write up) was born.
Solving the flaws
The first flaw I had to deal with was the stuttering and periods of unresponsiveness. This was critical as it actually would ruin my music listening. After monitoring the pi I found out that the pi was running out of RAM, causing it to swap to a (very slow) SD card. It would run out of RAM because I wrote the mpd client in Python, which is a bit too bloated for the single core 256MB pi to handle in addition to mpd (which uses RAM for audio buffering).
There was no real solution to the bloat. Python just used too much RAM. In addition it took too long to start up for the task it had to do. As a result I decided to re-write the client in C. Good practice for me (as I rarely use C anymore) and it solved my RAM issue. With the new C based client, the overhead was low enough that both it and mpd can share the CPU with the OS without causing audio stuttering or other problems. Now the system could reliably play music without issue.
The second flaw I had to deal with was the indexing of the mpd database. Even with my new C client, I found that mpd would run out of RAM if it tried to index my entire music collection. If you used swap it would crawl for so long that it could take more than a day to index the DB, plus during that time the player was unusable. After much research and investigation there seemed no way I could improve on the situation. I even looked at whether it was possible to index the DB offline on my server and just have mpd on the pi read the db, but this wasn't supported by mpd. At the end I felt I had two options going forward: I could either modify mpd to support external DB indexing, or I just buy a more powerful pi.
I decided to do the latter and duly bought a raspberry pi 2. It has 1GB of RAM which should be more than enough for our needs and it also has 4 cores. I felt it would be better to upgrade the pi because even if I did write the software for offline mpd DB indexing, there is no guarantee that down the line something else will consume all the RAM and cause issues. Fact is 256MB of RAM is not that much anymore, and Linux gets more bloated every year (I remember when an entire Linux distro could fit on a floppy drive and run in 16MB of RAM).
Plus if I ever wanted to add features to the system, I may again find myself without enough RAM, or too many processes fighting over the single CPU. Audio streaming is latency sensitive so interruptions can cause jitter and stuttering. As such I felt it would be better if I could dedicate a single CPU to mpd and a single CPU to the VFD client. With 4 CPUs on the pi2 I can do that and also have two CPUs free for background and OS tasks.
Now we have three of the flaws resolved, but the resets persisted. In fact it had gotten worse with 4 cores and higher clock speed. With time I noticed the resets seemed to be related to load. The longer the pi was under load, the more likely it would eventually reset. I suspected a poor PSU (that is normally the issue with pi's), but replacing that with a more powerful version didn't help.
Next thing I suspected was that it was overheating. So to find out I wrote a program that printed the CPU speed and temperature on the VFD, like so:

The good thing with using the VFD is that it would keep its state as long as it had power even if the pi died, so with a 1 second update I would get the temperature at the last second before the pi stopped responding. I didn't have to monitor it but instead I put it under load and went to do something else. When the music stopped I would go and read the data last printed on the VFD.
Sure enough the temperature was high just before it would reset. The VFD showed 87°C while the pi CPU is only rated to around 85C, so presumably there is some kind of thermal cut off if it exceeds this. I was surprised it got this hot, considering that while it was inside a case, the case itself was well vented, roomy and without any other heat generating systems nearby.
Whatever the reasons, the solution seems to be "better cooling". I looked online and there were loads of little "pi fan and heat sink" combos out there to buy. However I wanted to keep this system fanless, both from a noise and maintenance perspective. Also many of the systems on offer were designed to fit in standard pi cases so they had to compromise with a fan for added airflow or a very small heat sink, while I had a lot more free space to play with.
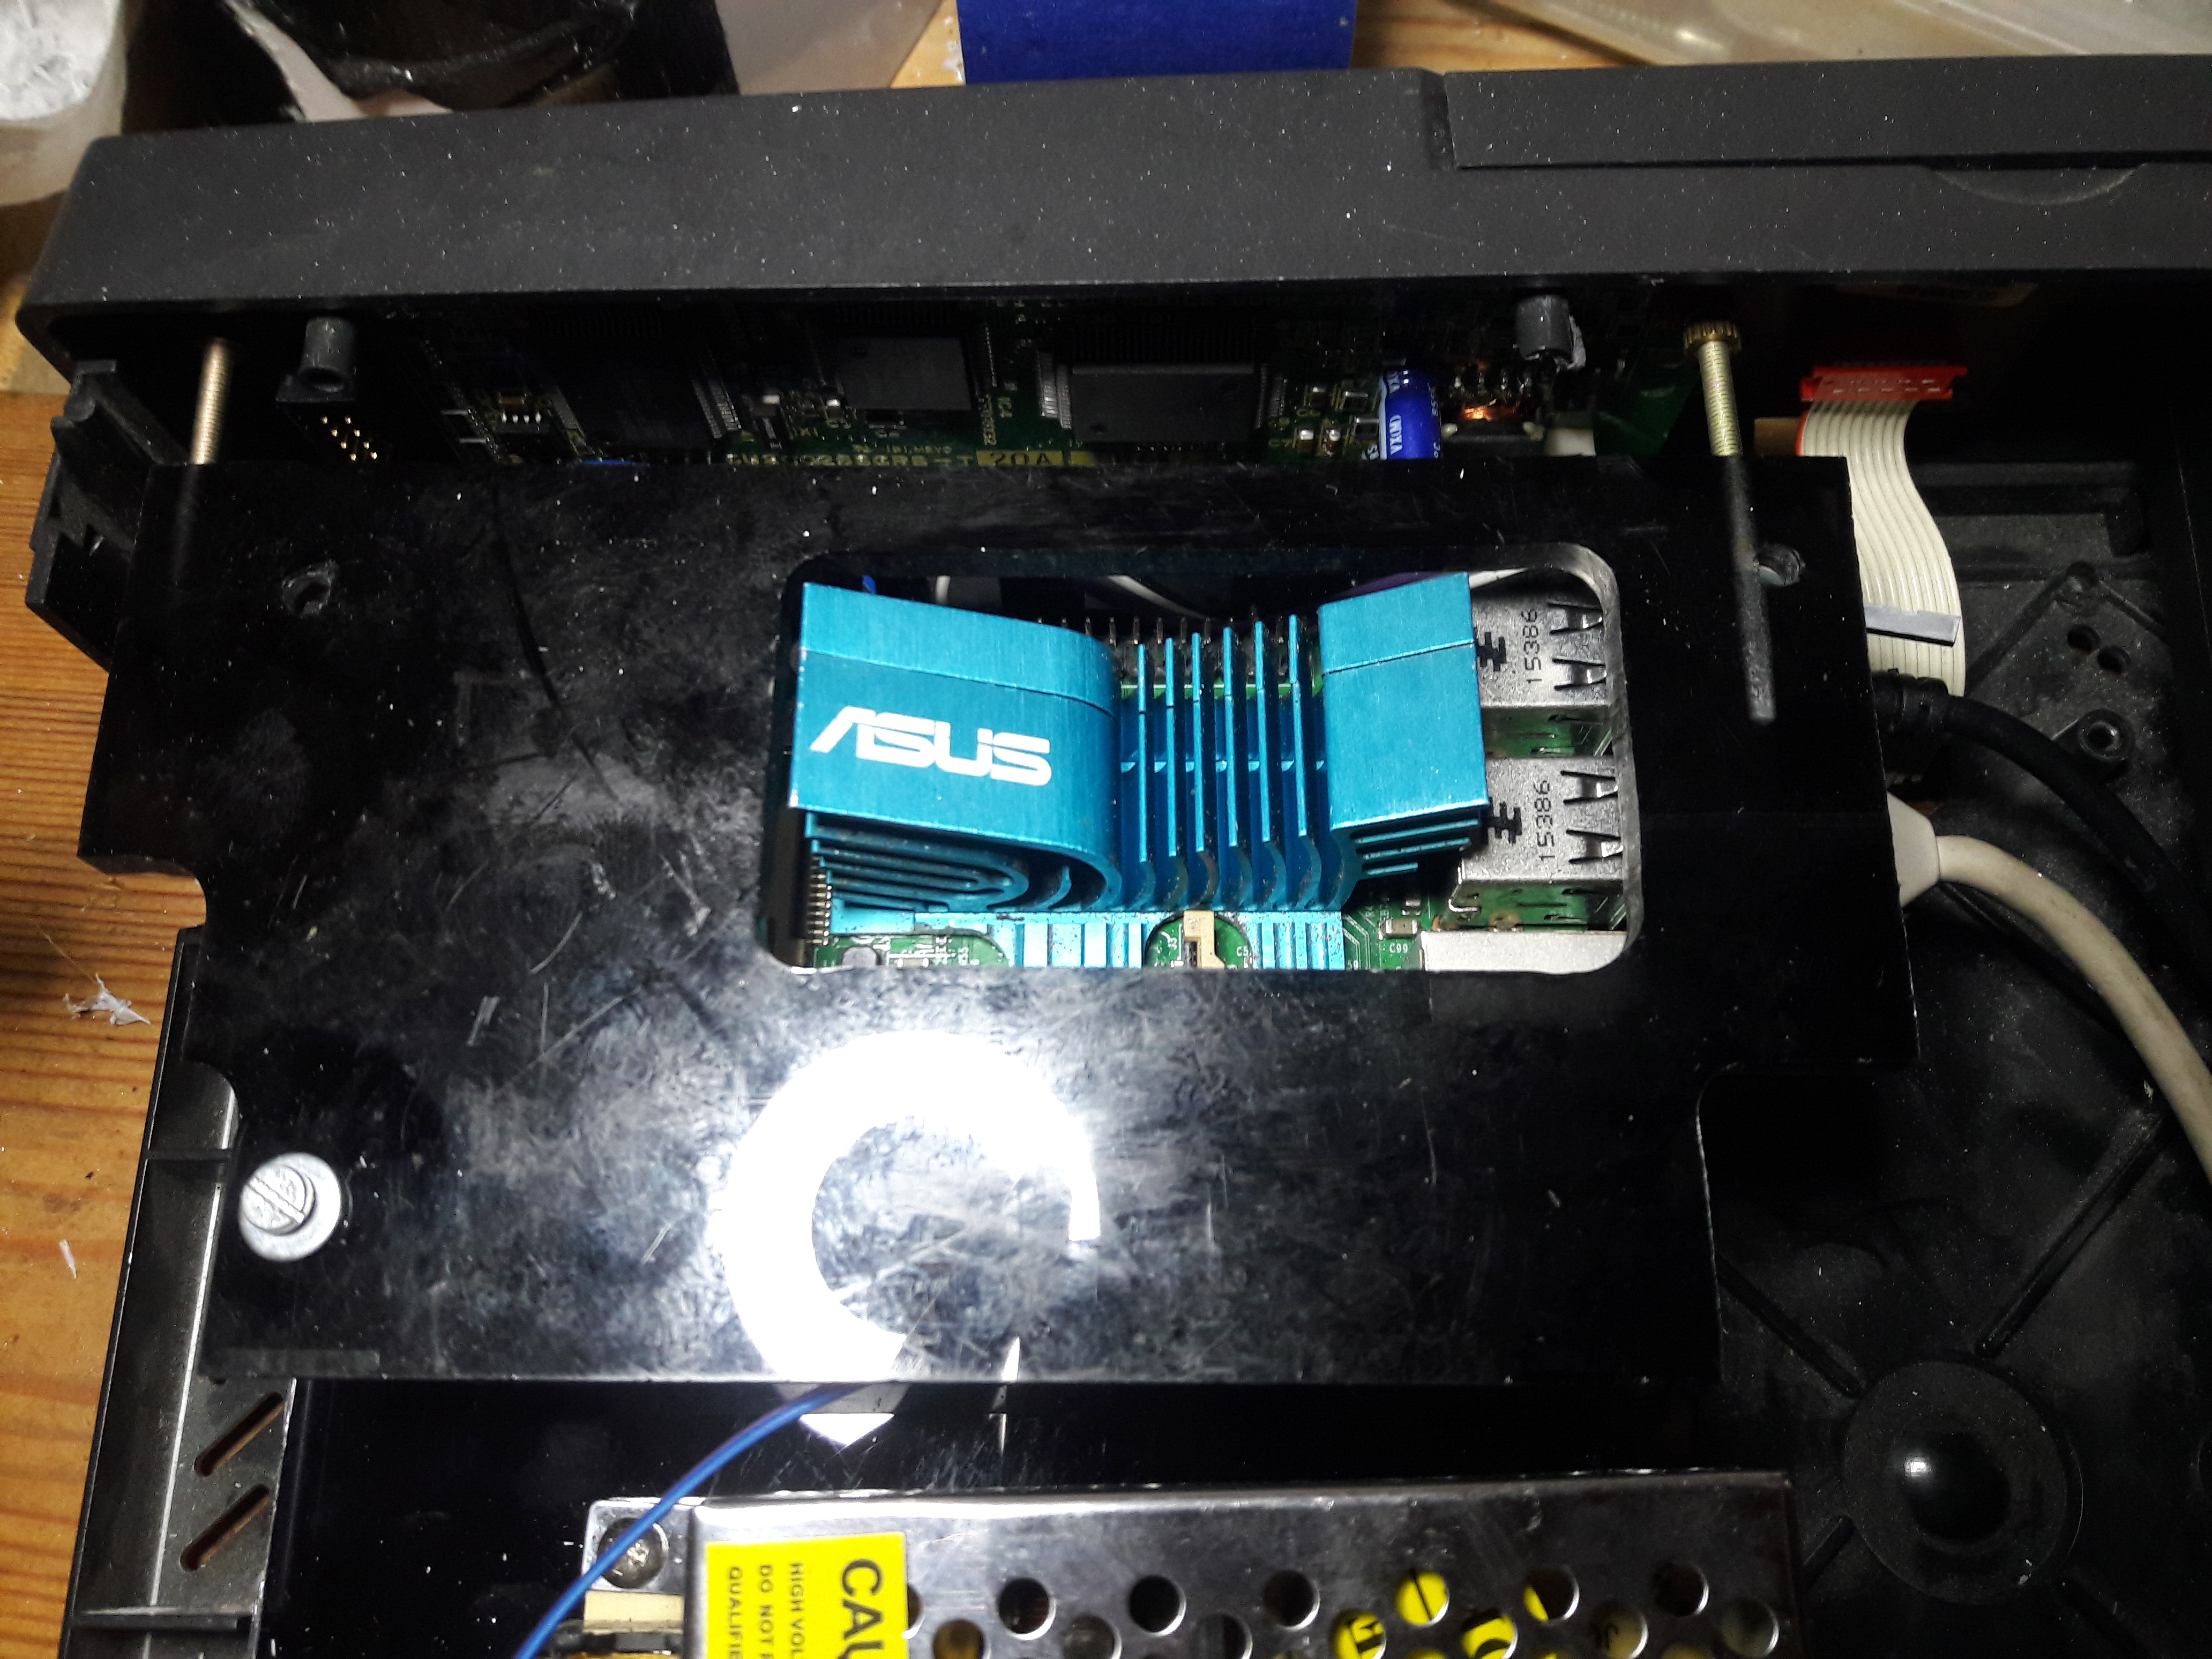
So I rummaged around my junk box for a suitable heat sink, and found an old ASUS motherboard northbridge heat sink. It looked perfect for the job, and even looked quite snazzy in its blue anodised aluminium. Making it fit the pi however, required some work on my milling table. First thing I did was level off the base:
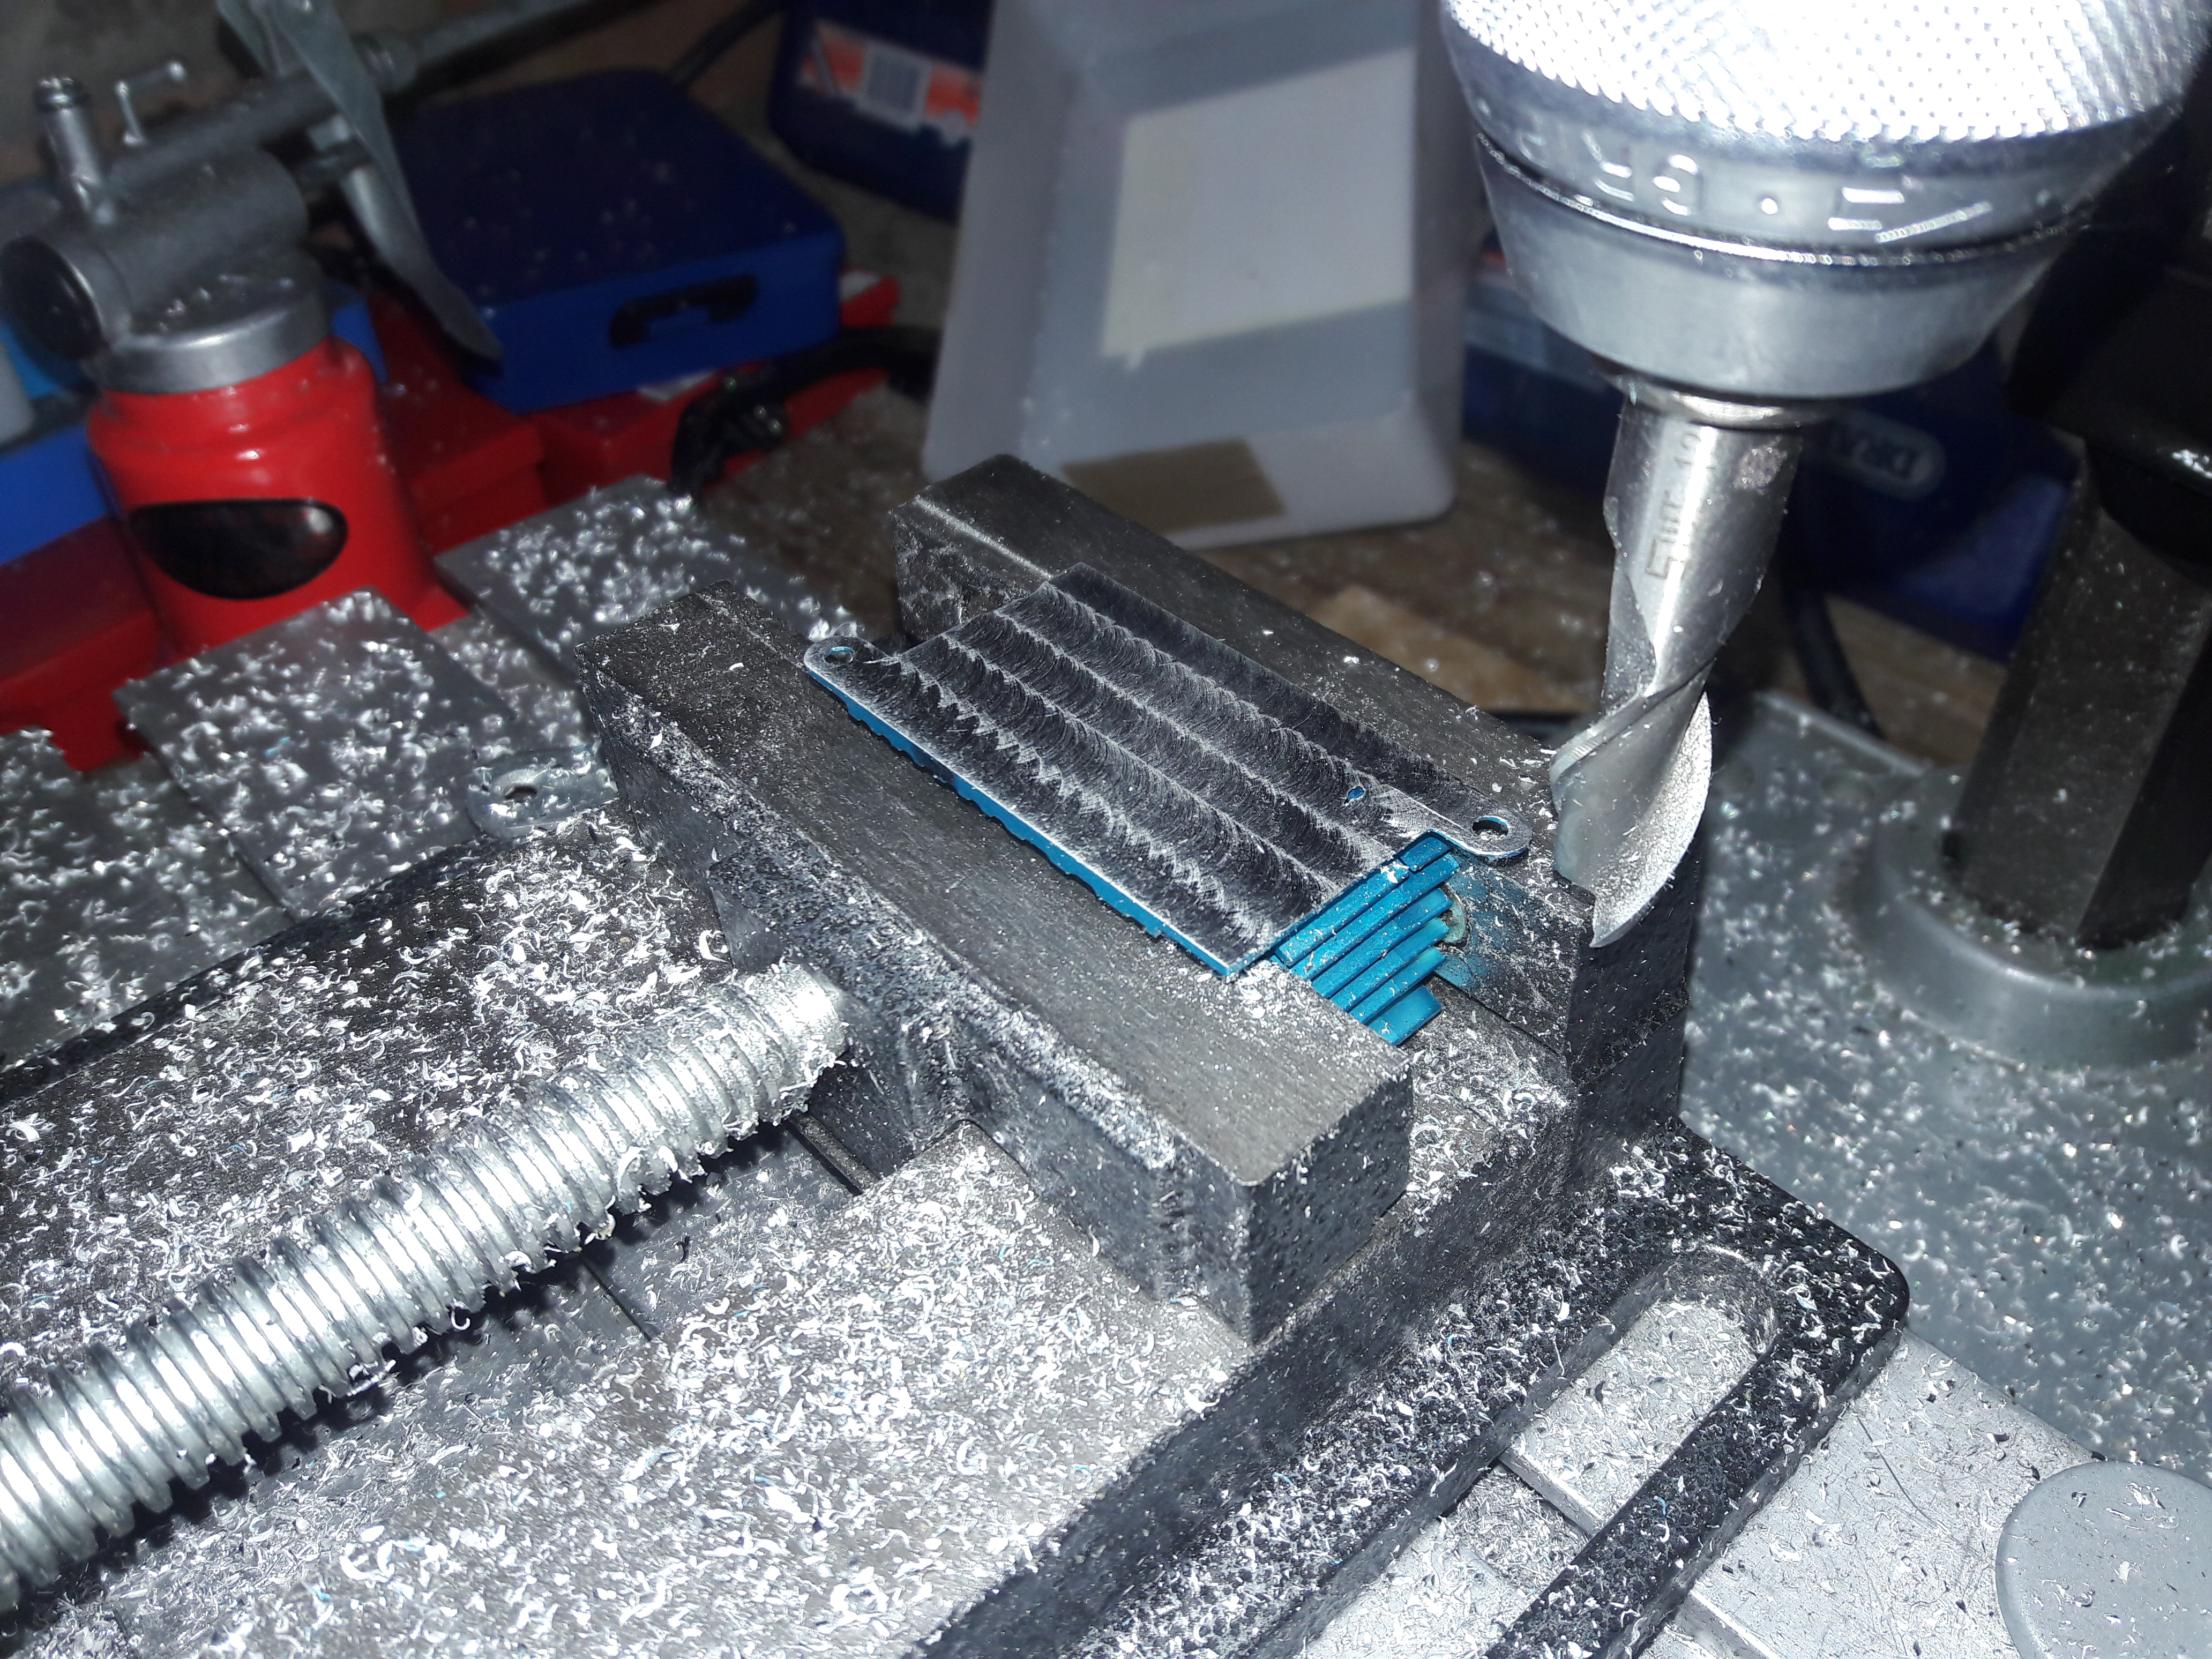
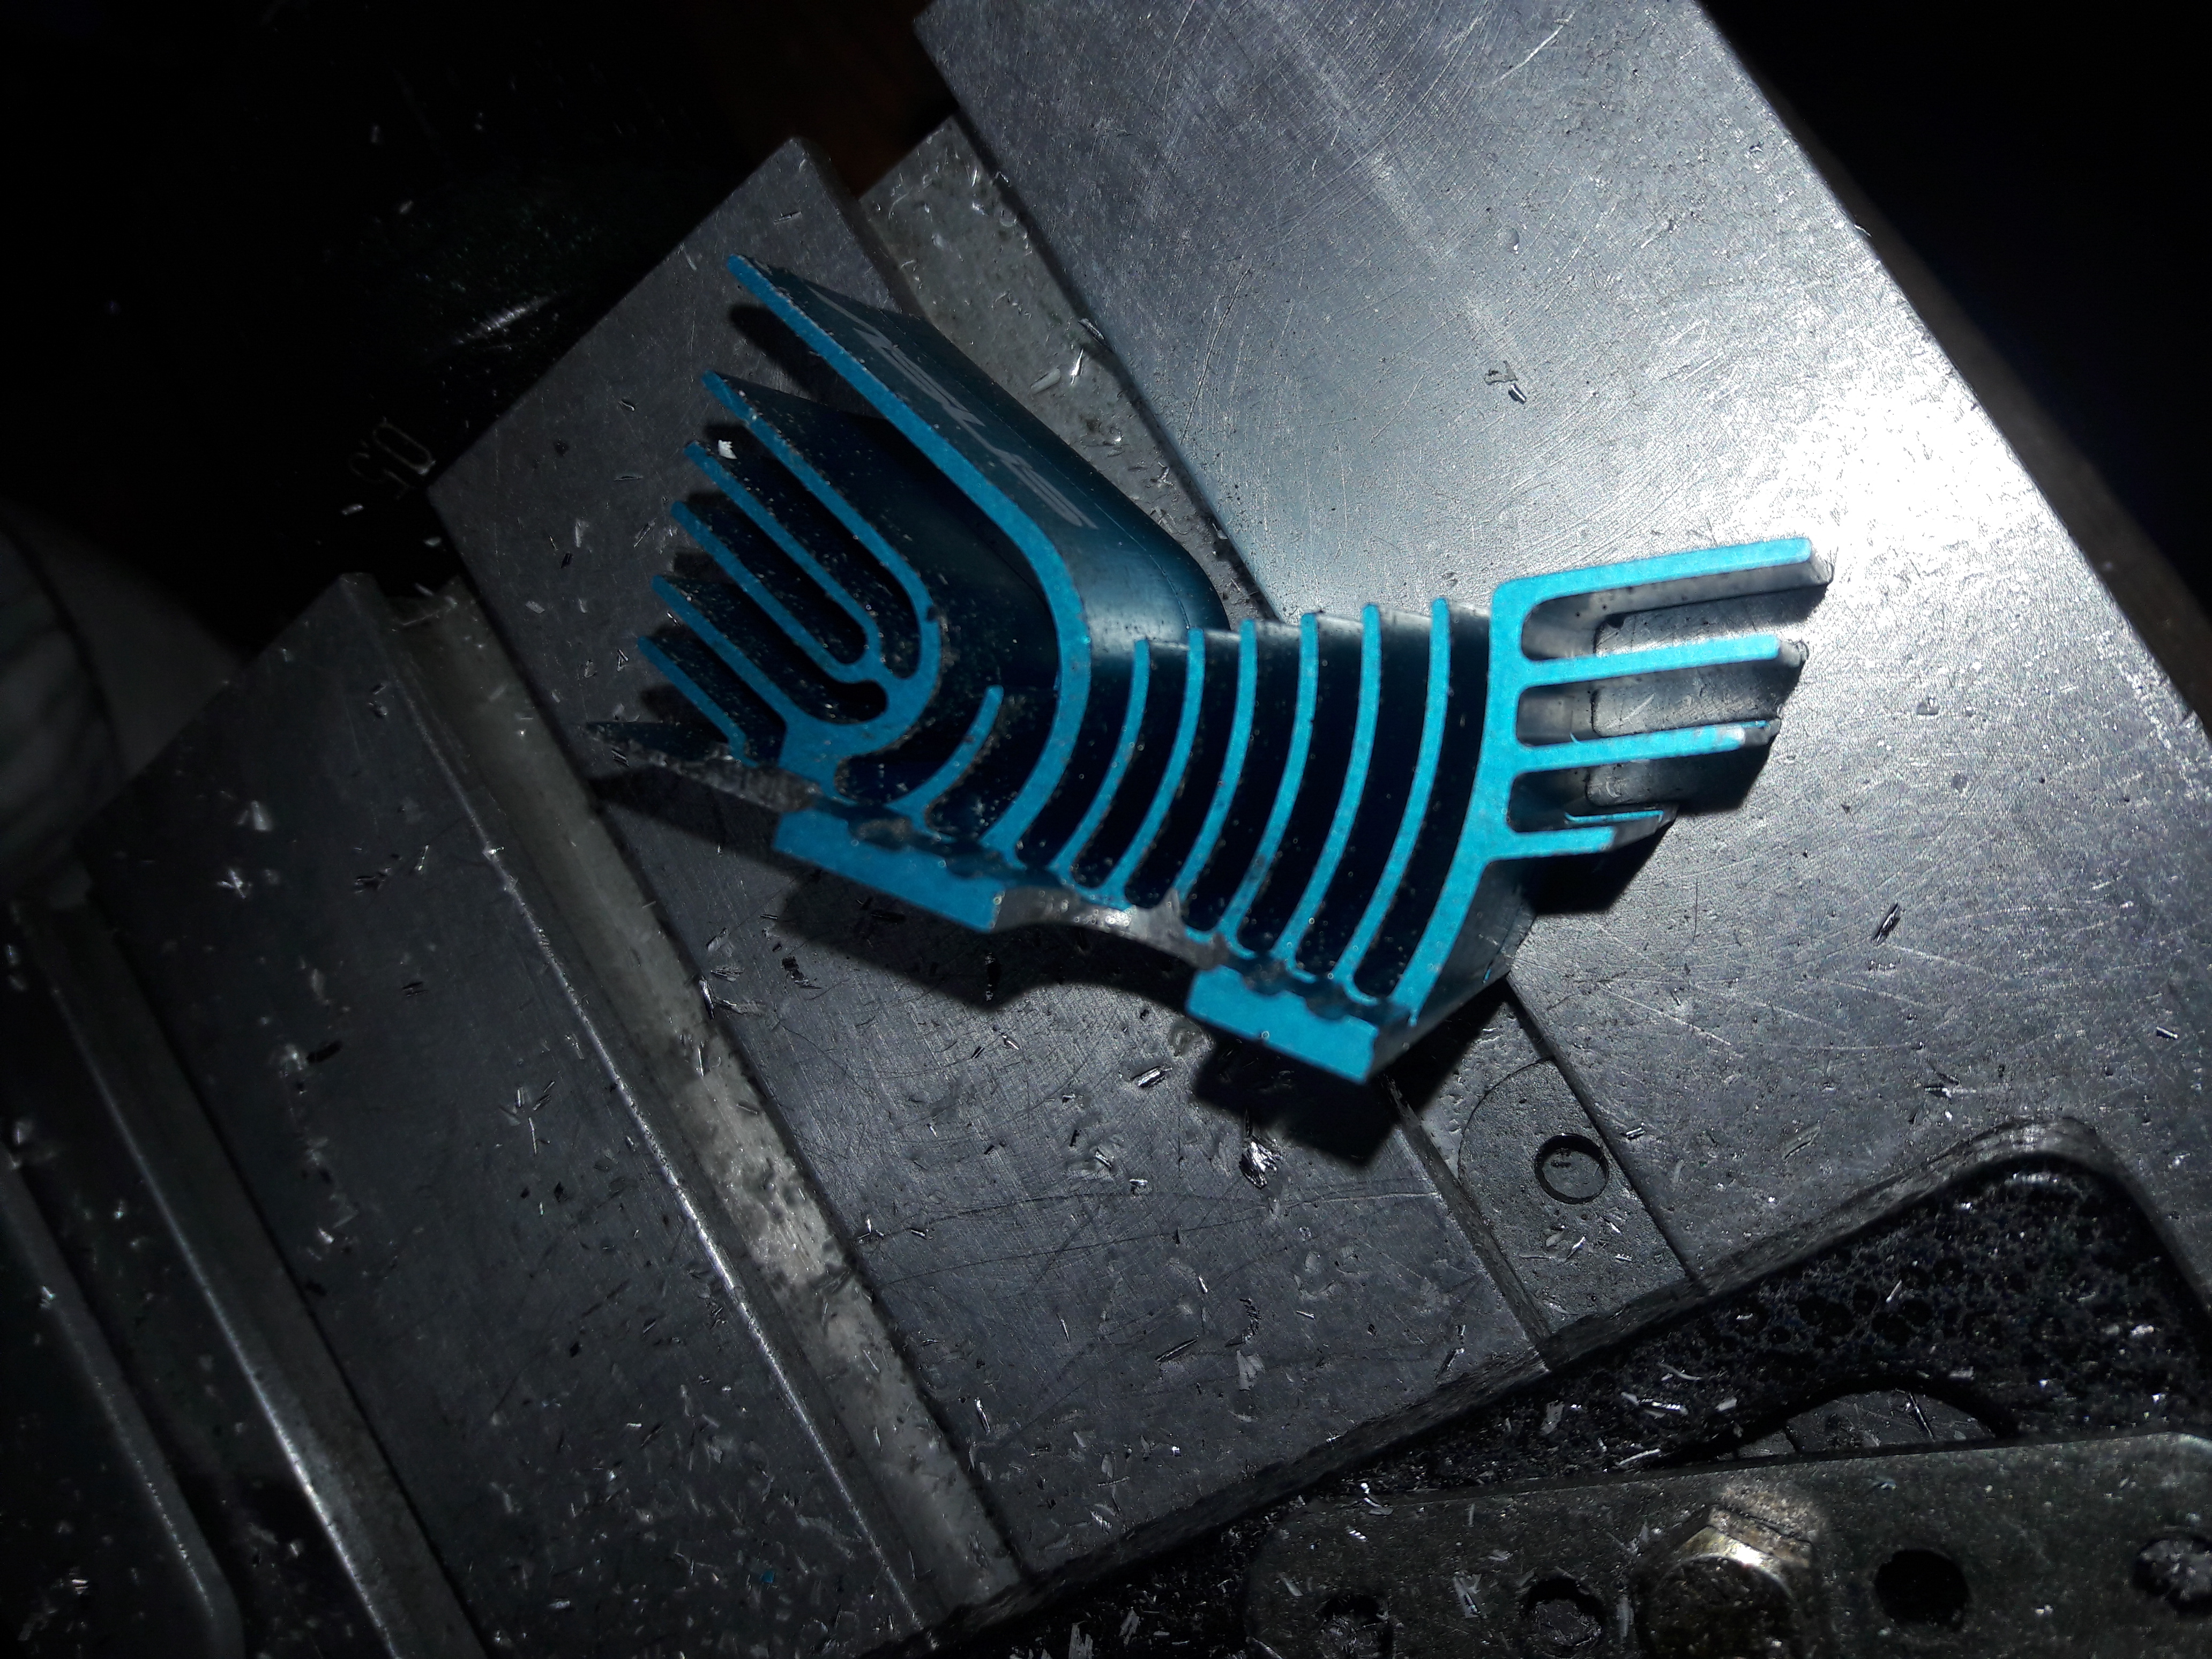
Then I had to work out which bits to mill away so it could fit on the pi. This was tricky as I needed it to rest on the CPU/GPU and any other bits that could do with cooling without shorting anything out. I found out that we only needed to mill out three notches and some of the fins in order to clear the USB/Ethernet ports on the pi's edge. Here are the notches milled:
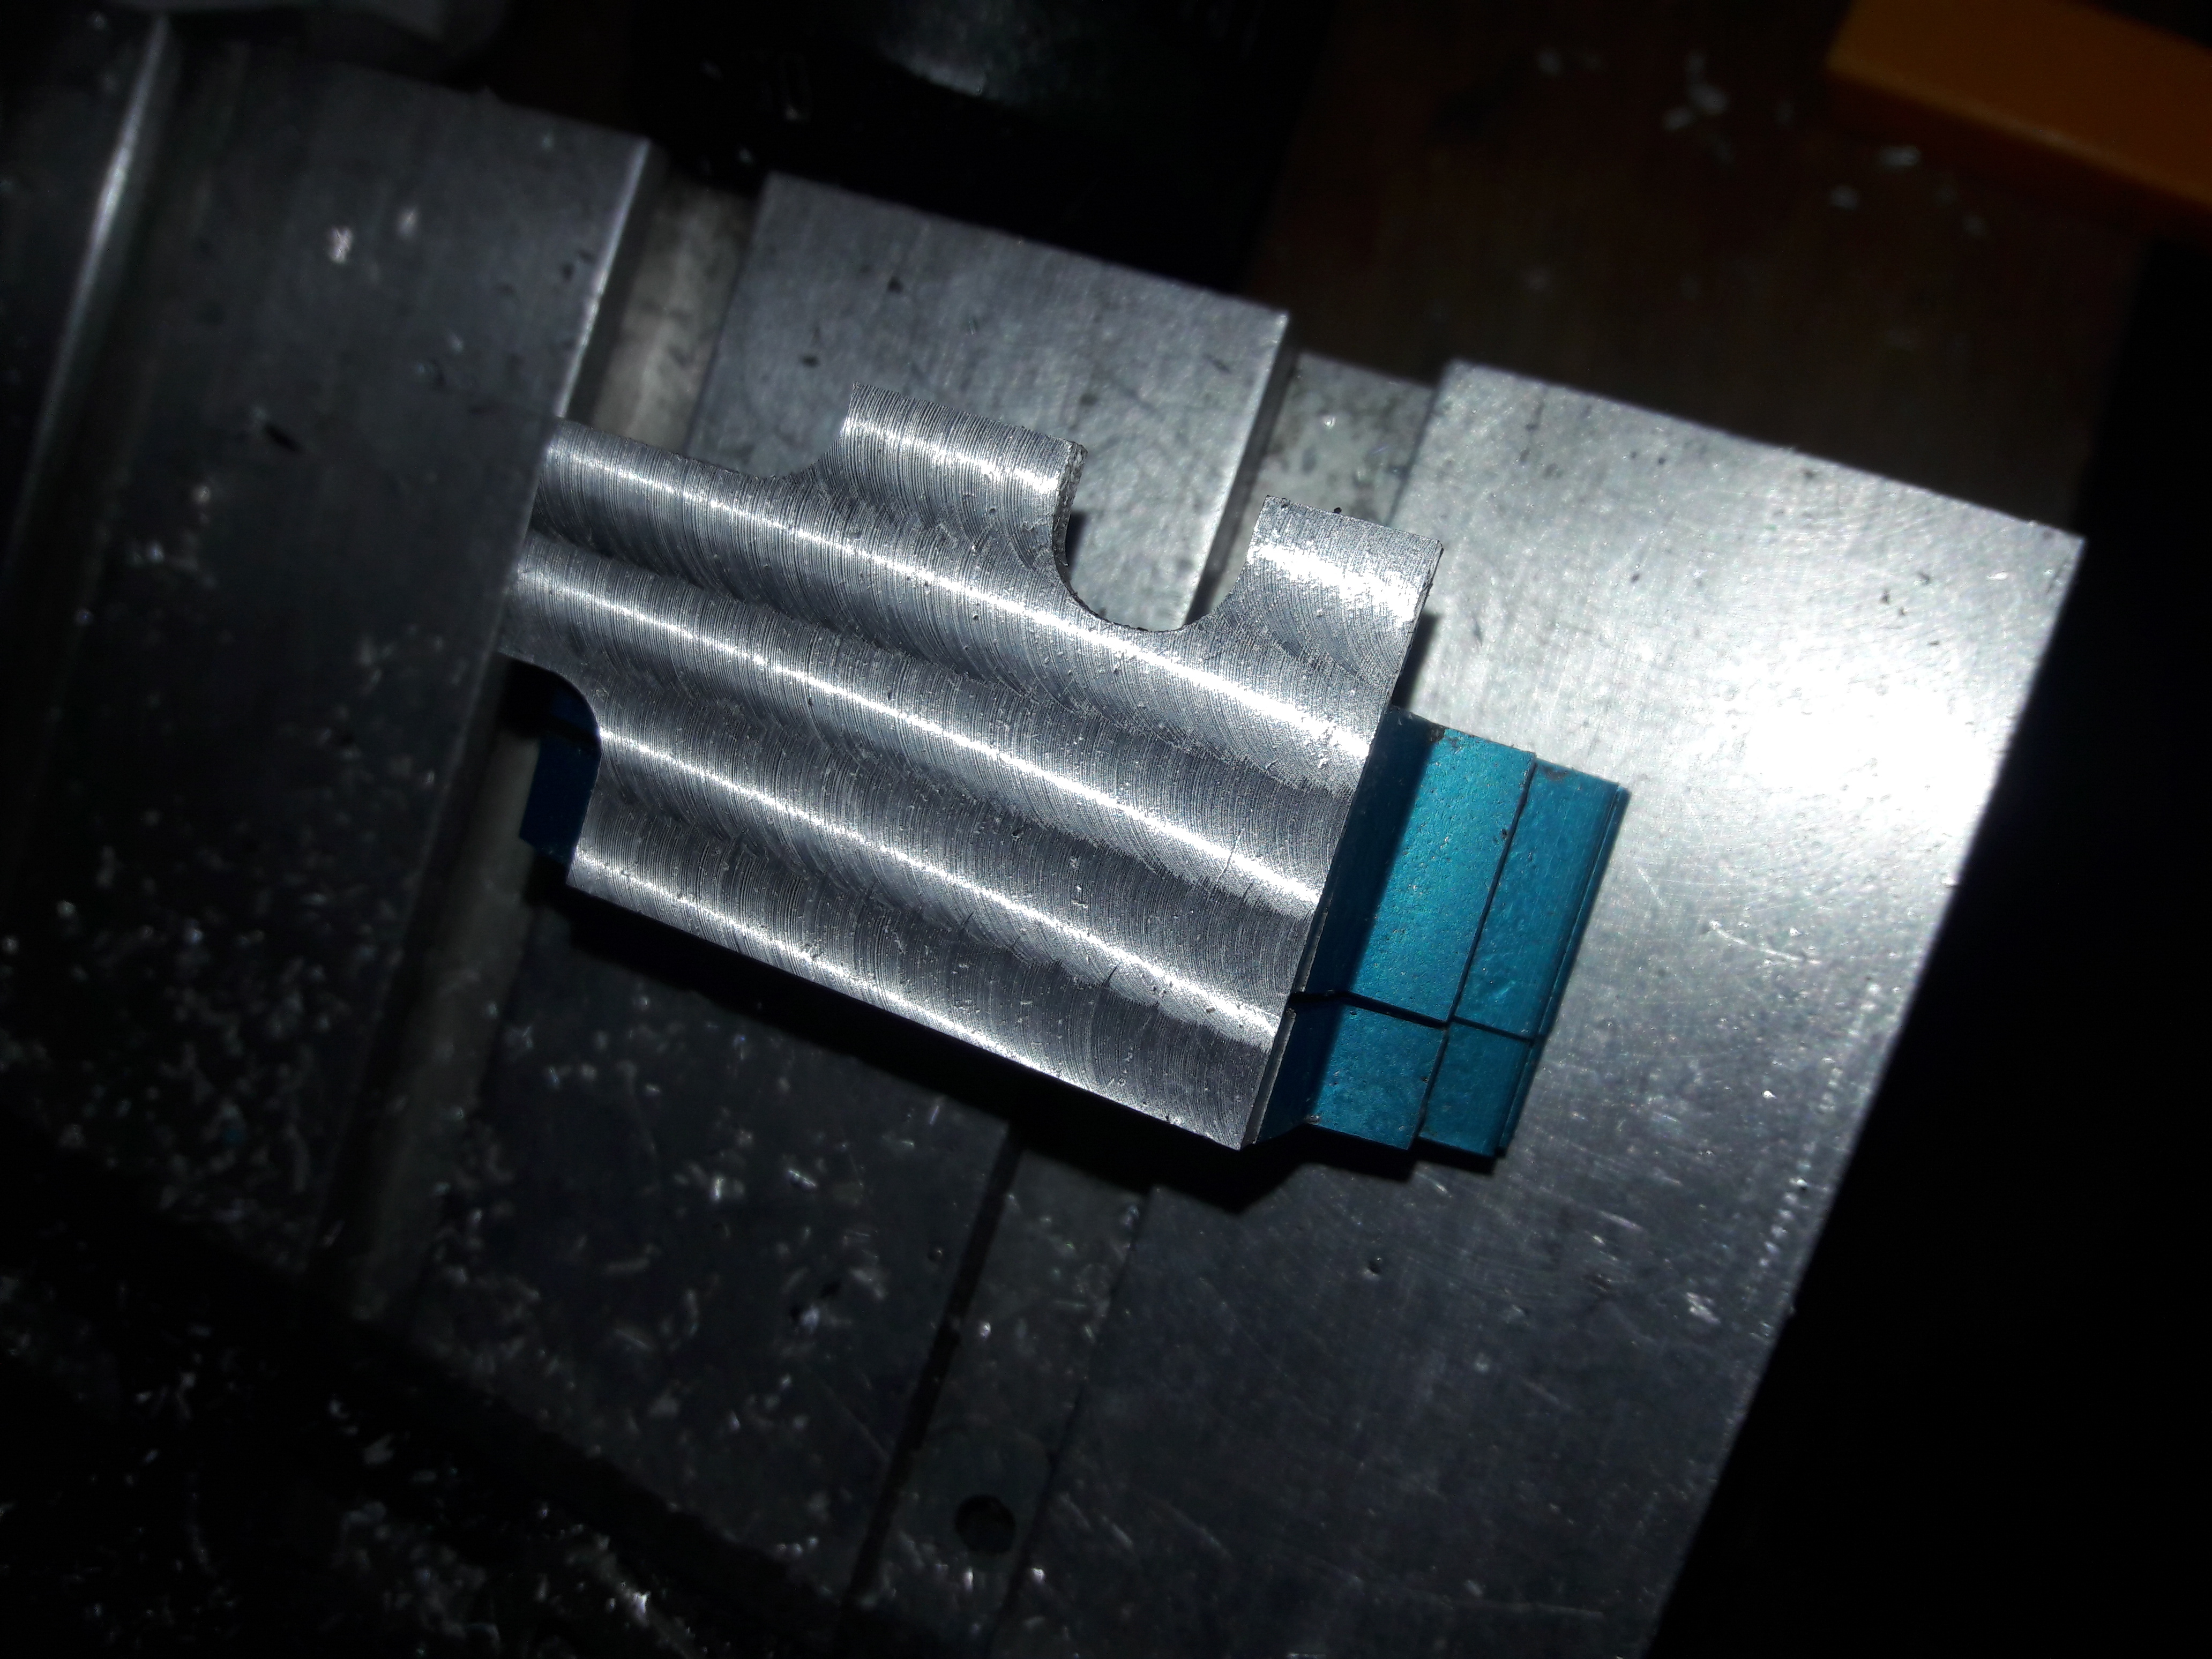
The fin on the bottom milled for the USB/Eth ports:
The heat sink attached to the pi for test fitment (hence still has some swarf on it). It is probably the only "ASUS" branded Raspberry pi on the Internet :-)
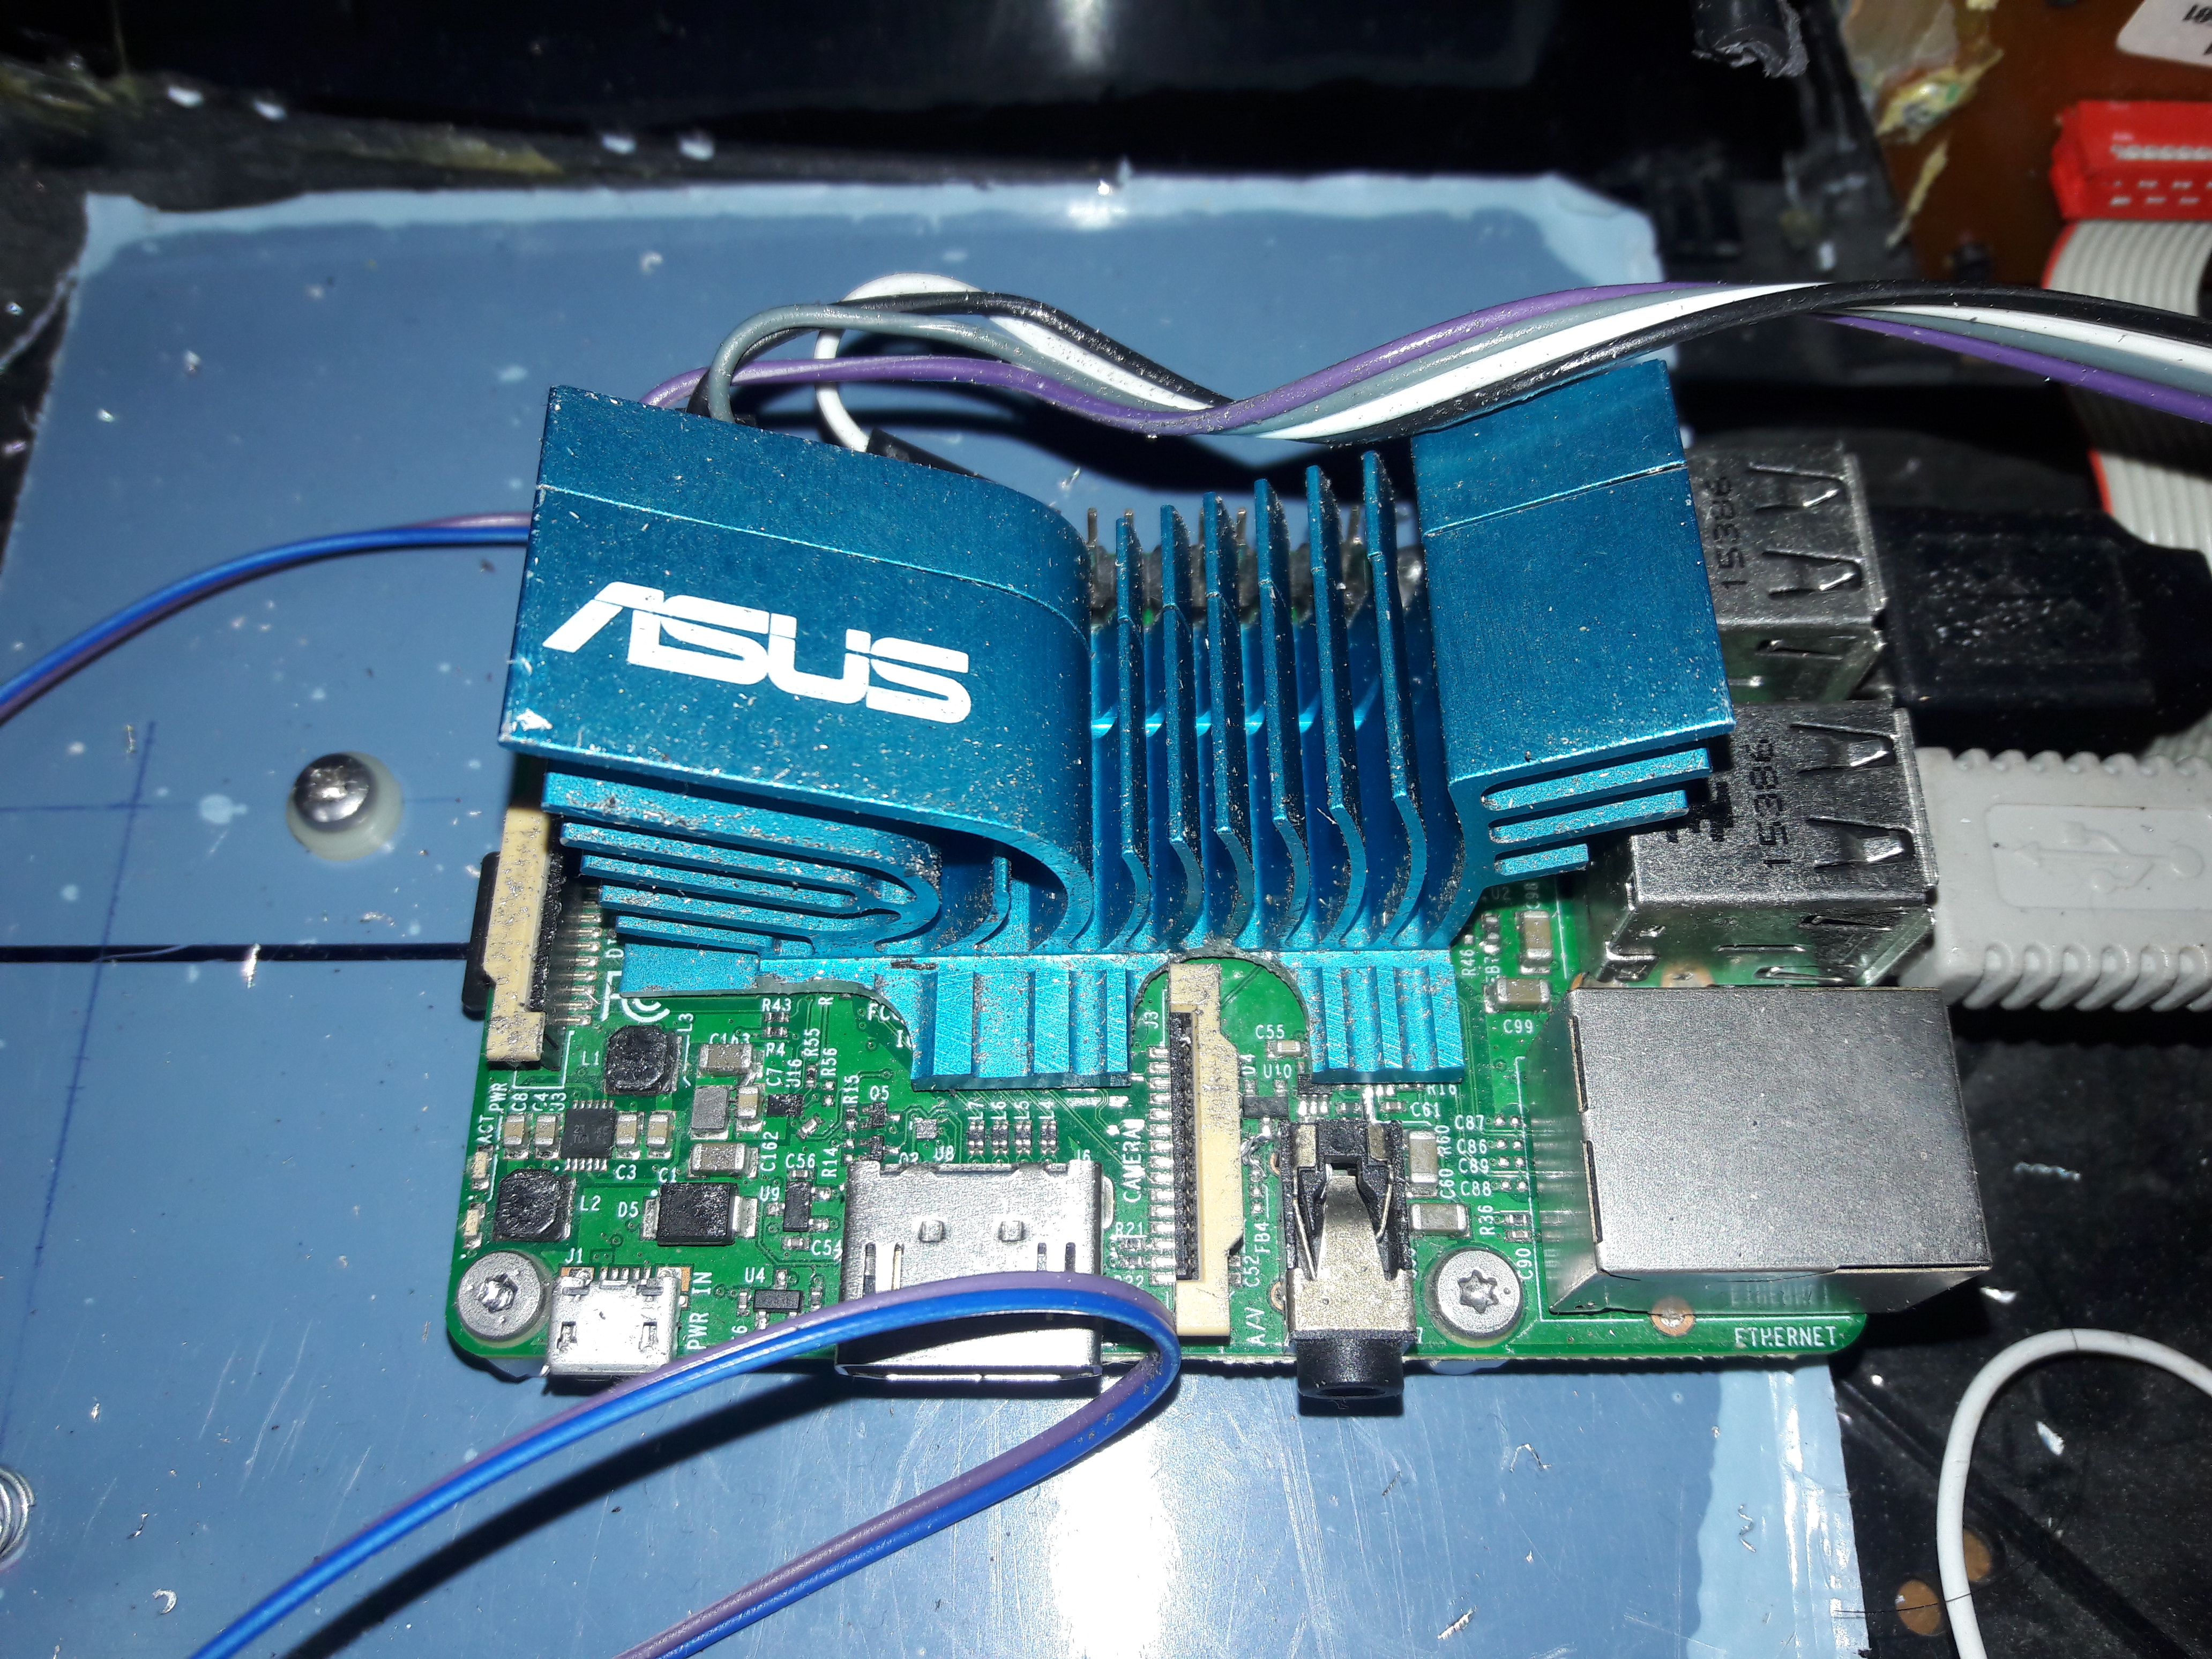
I found that the heat sink compound I used is itself sticky enough to keep the heat sink firmly attached to the pi, so I didn't have to worry about screwing or glueing it down (after all this will go into a system that will hardly ever move). All in all it was a success, the random hangs/resets had gone and in the case under full load the CPU temp did not go over 55°C.
Further improvements
With the flaws sorted, I could work towards properly fitting everything in the case. First thing I did was get some scrap acrylic and drill out locations for PCB standoffs. These were then used to mount the pi securely to the acrylic.
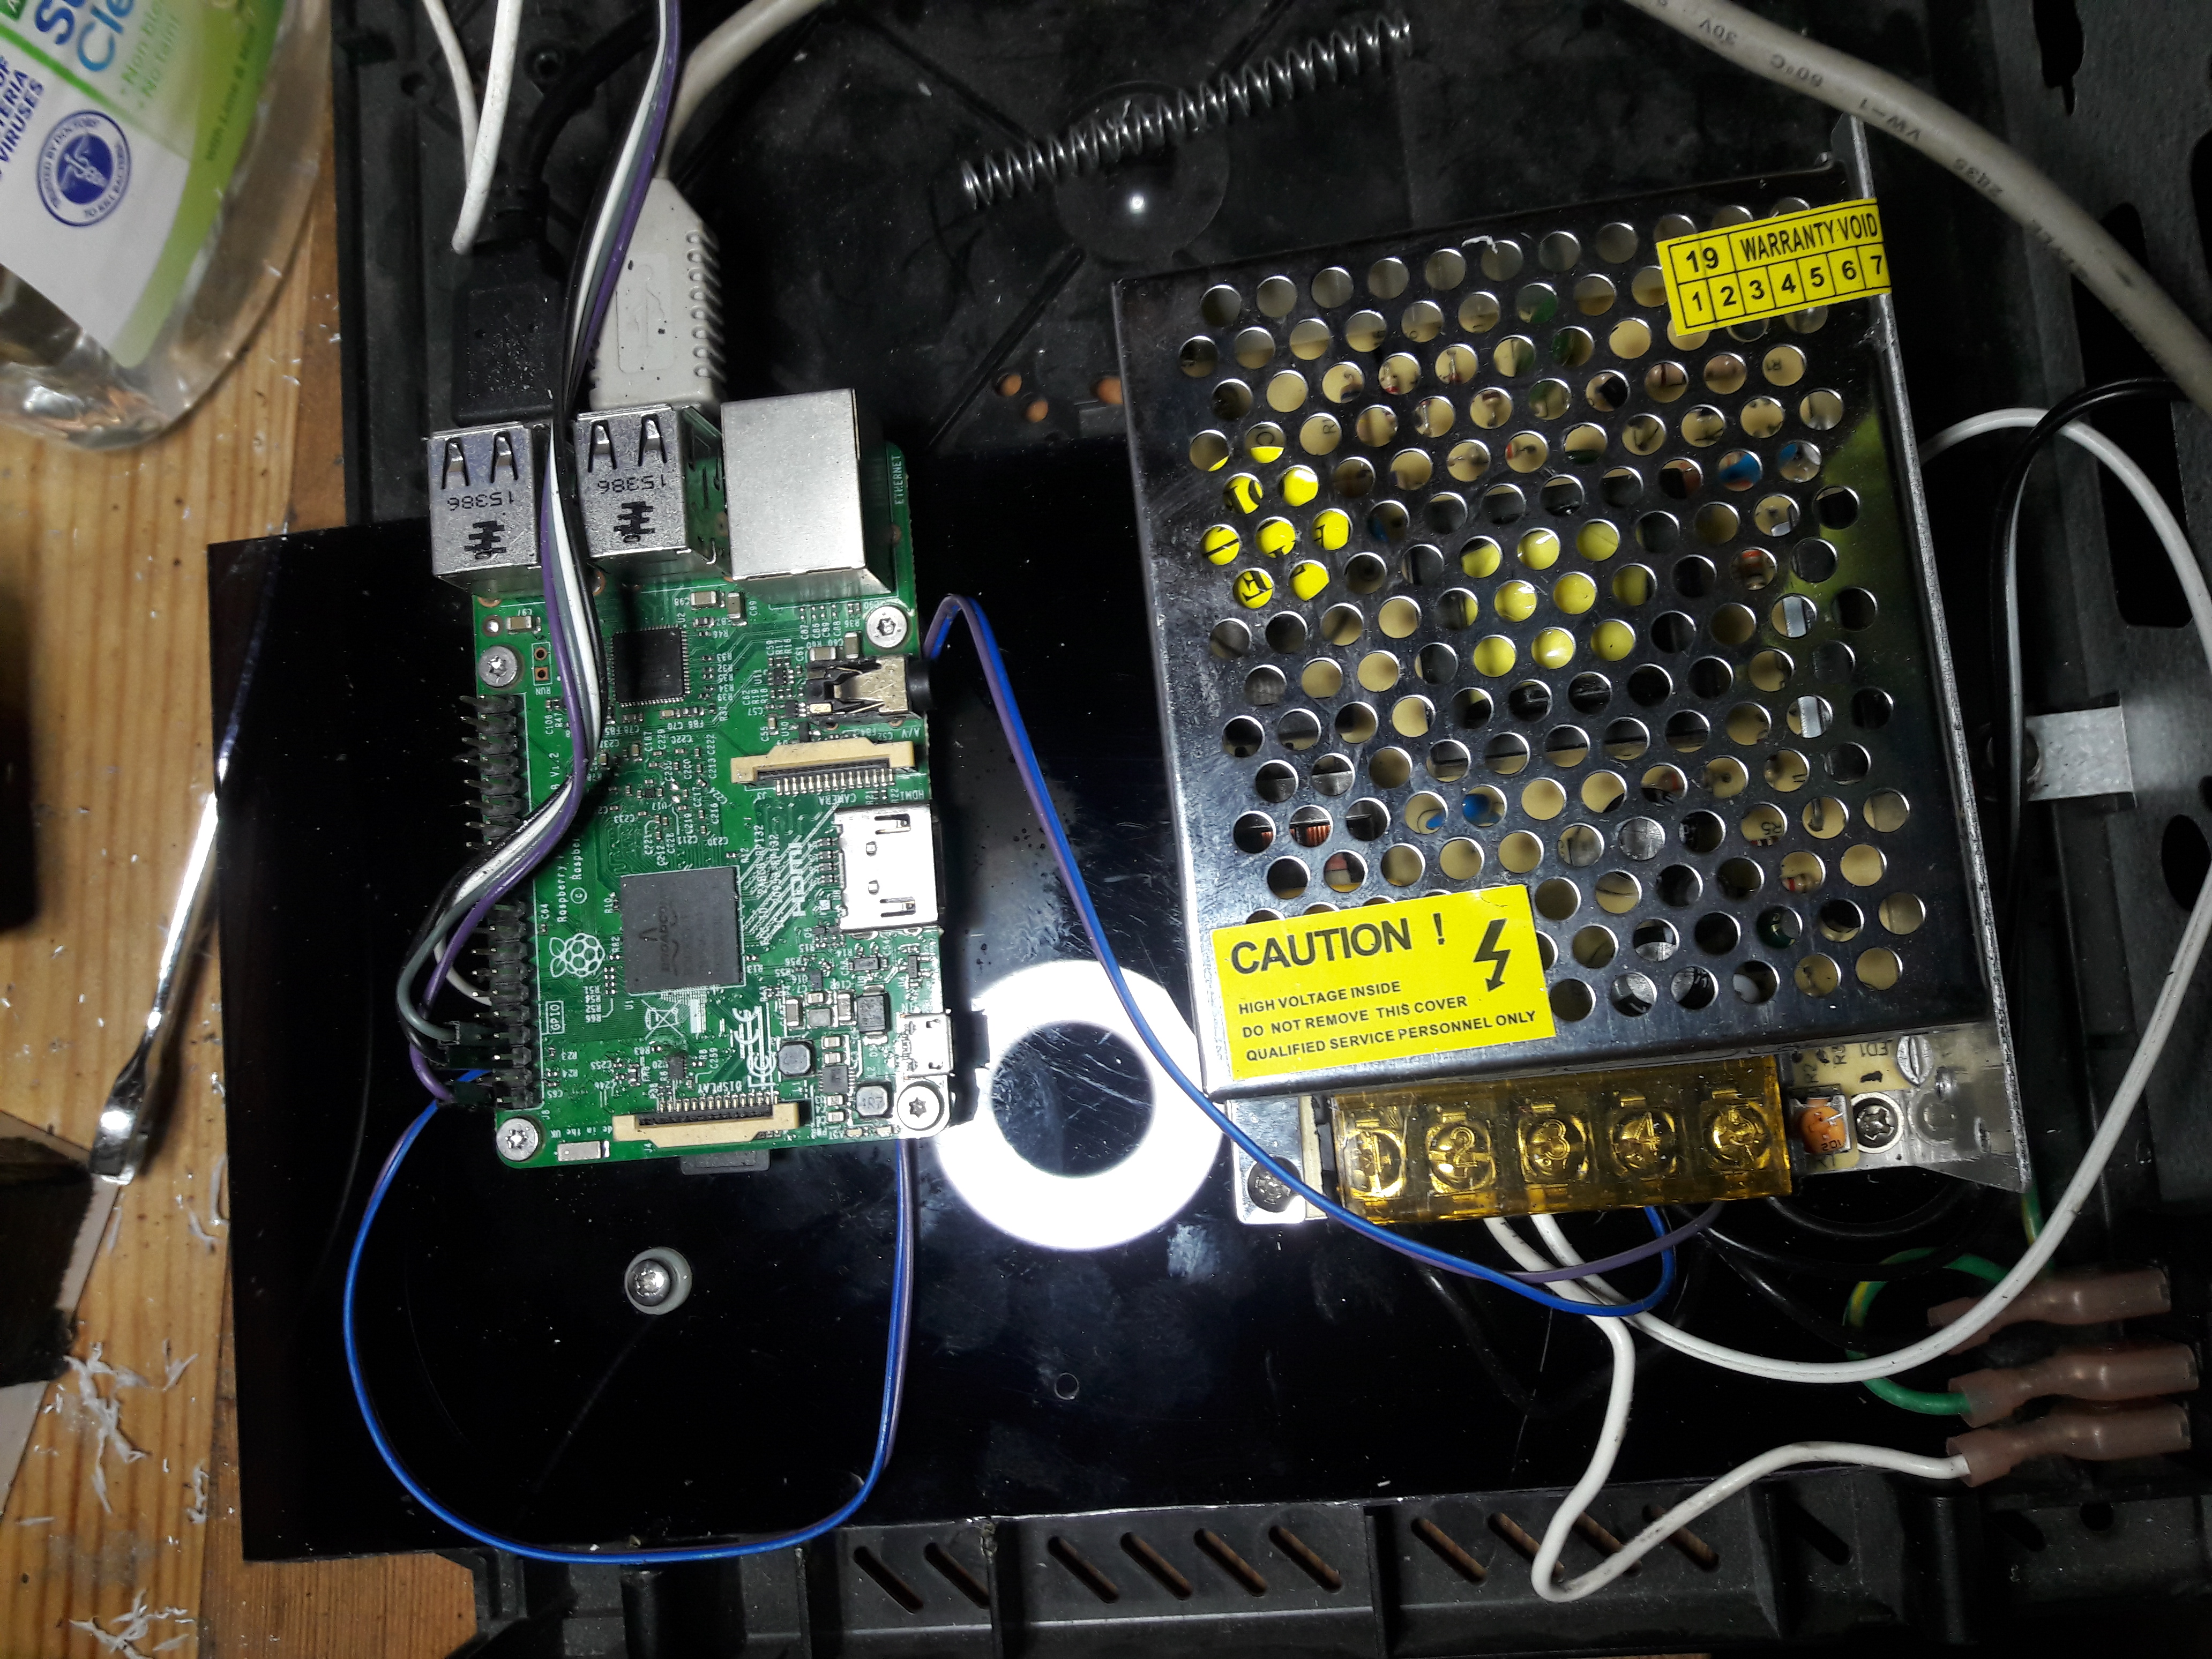
As I also wanted a to include a CD-ROM drive I bought a proper 5V 5A PSU, which should provide enough power for the pi, the USB sound card and CD-ROM combined. This too was fitted to the acrylic as shown below (without the heat sink yet attached on the pi):
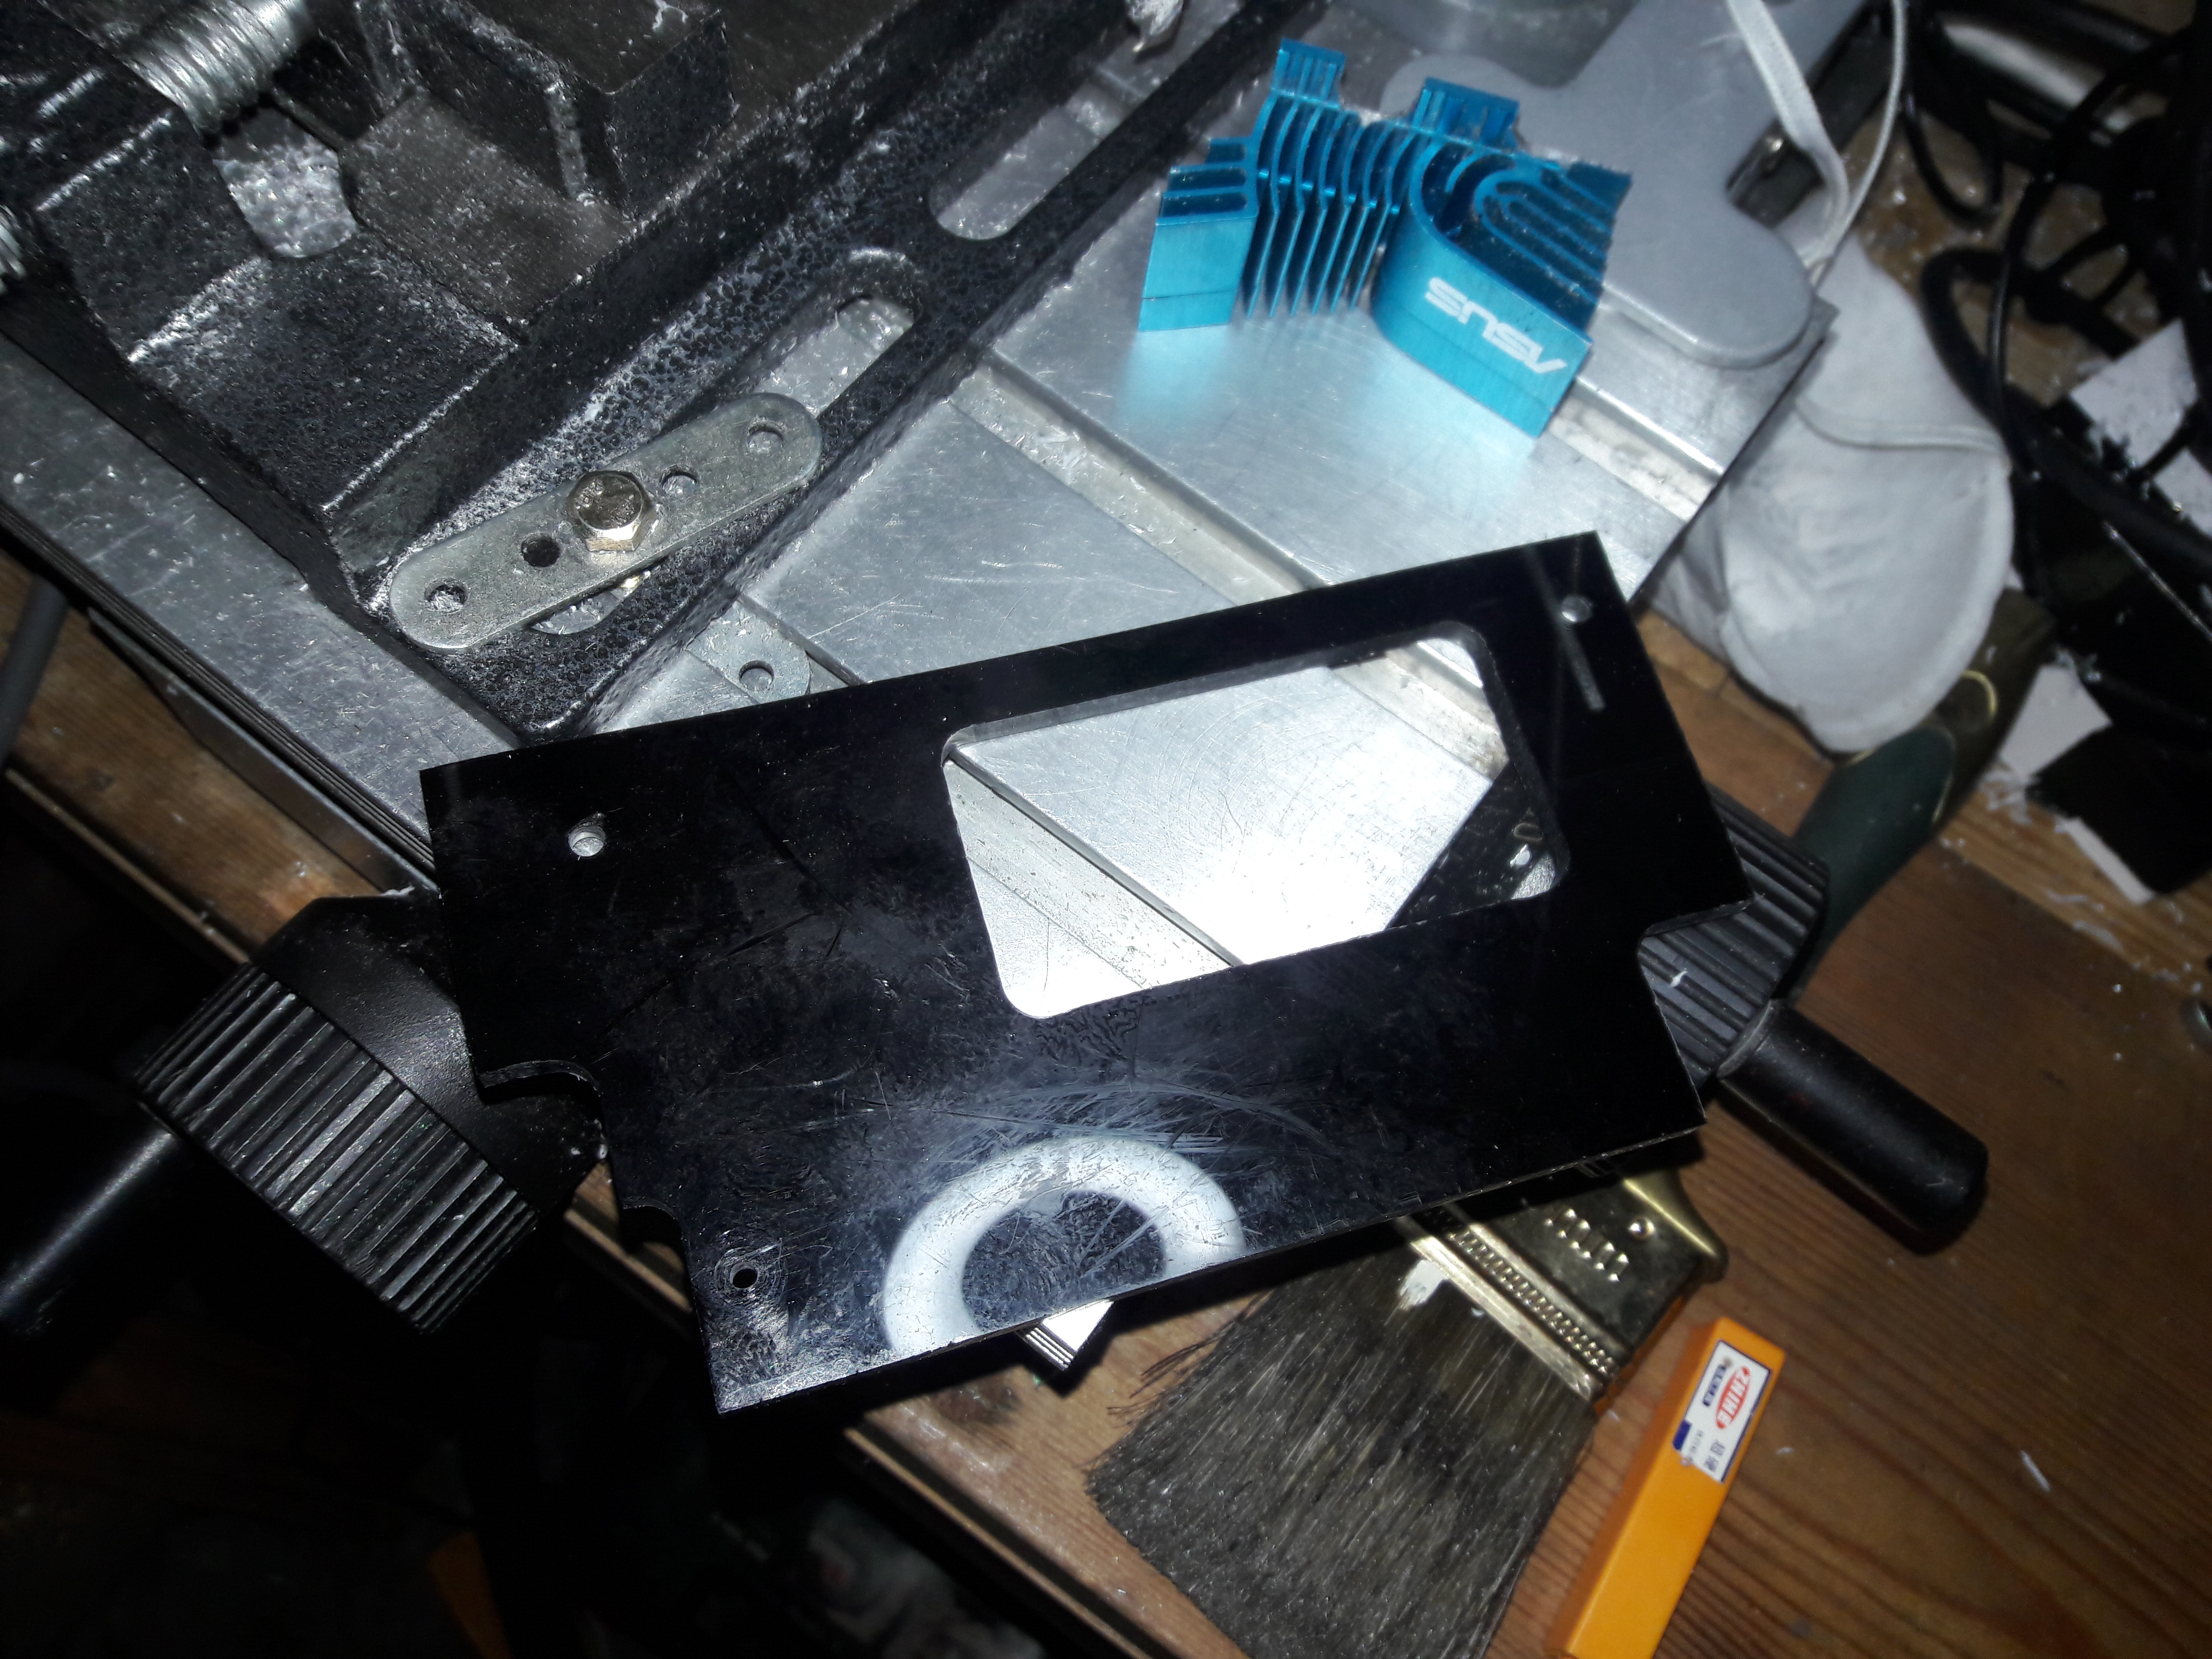
Next step was to find a way to mount the VFD so it sat flush near the front of the case (the Nokia has a nice tinted transparent section where the old 7 segment LED display was). To do this I made a top-section out of 5mm acrylic I had in my junk box from an old project, and holes were tapped for two long screws that attach the side of the sheet to the VFD.
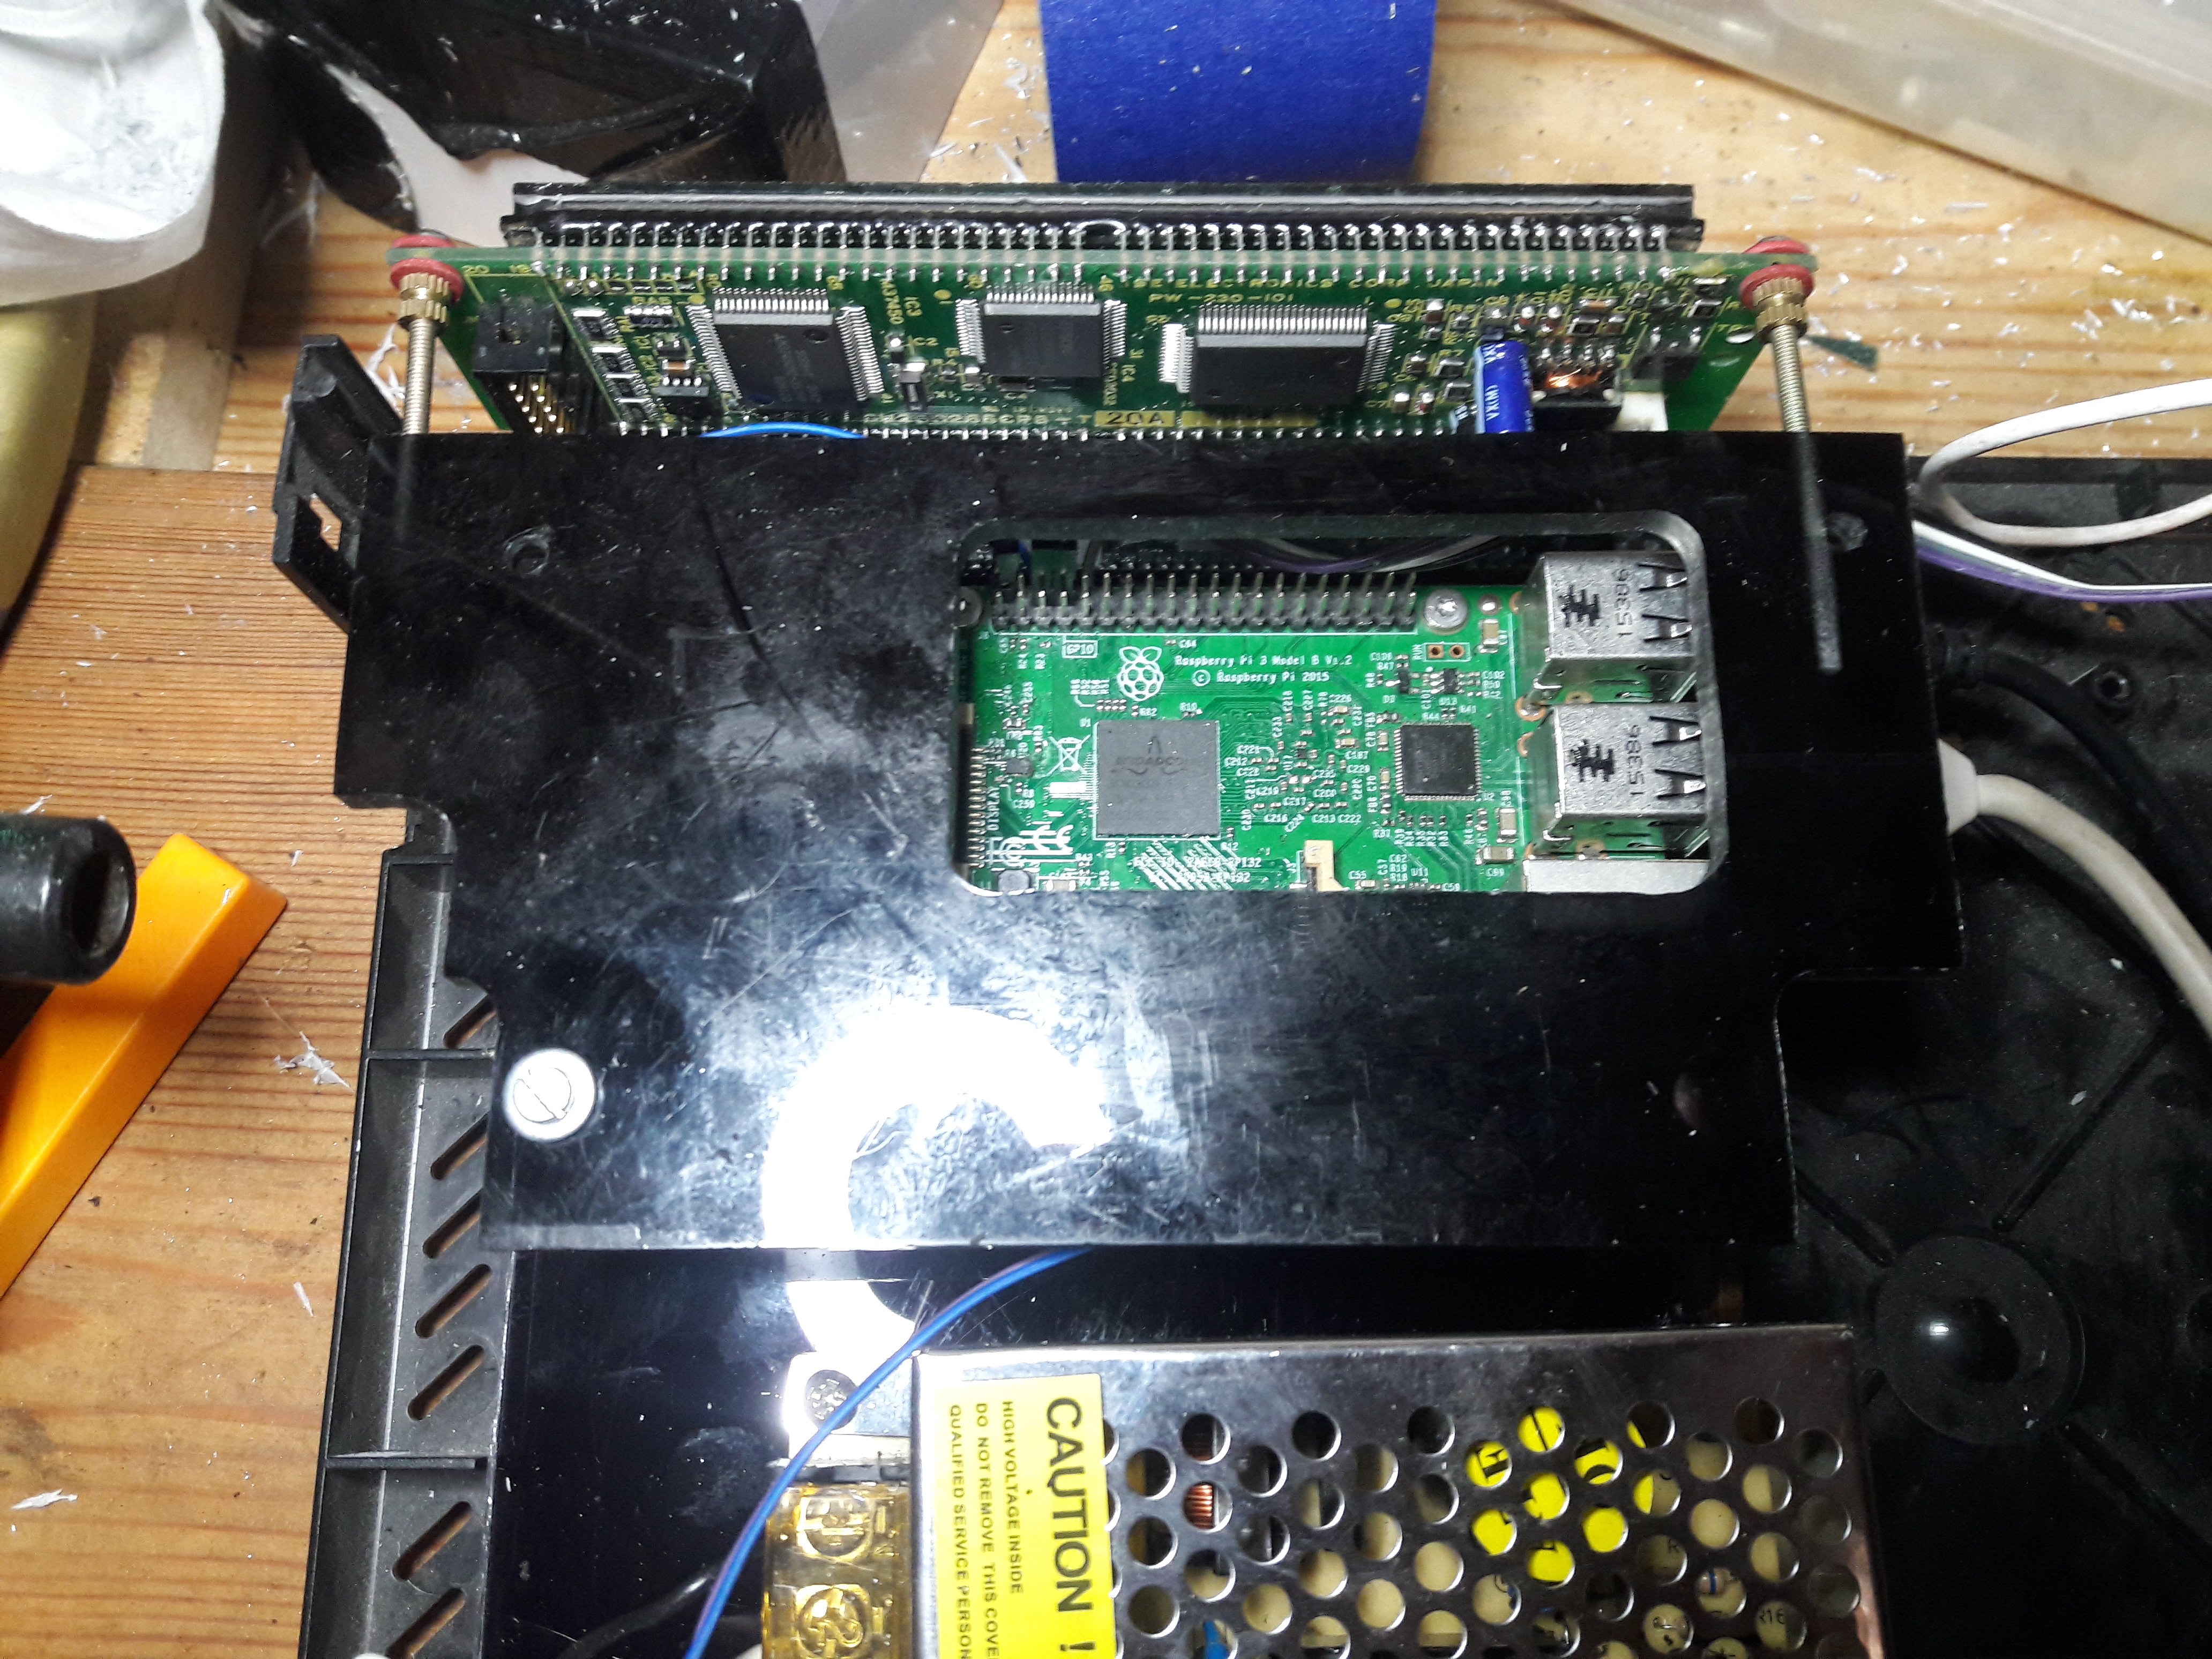
The plan was for this to sit on top of the pi, so a section was milled out for the heat sink to pass through for cooling:
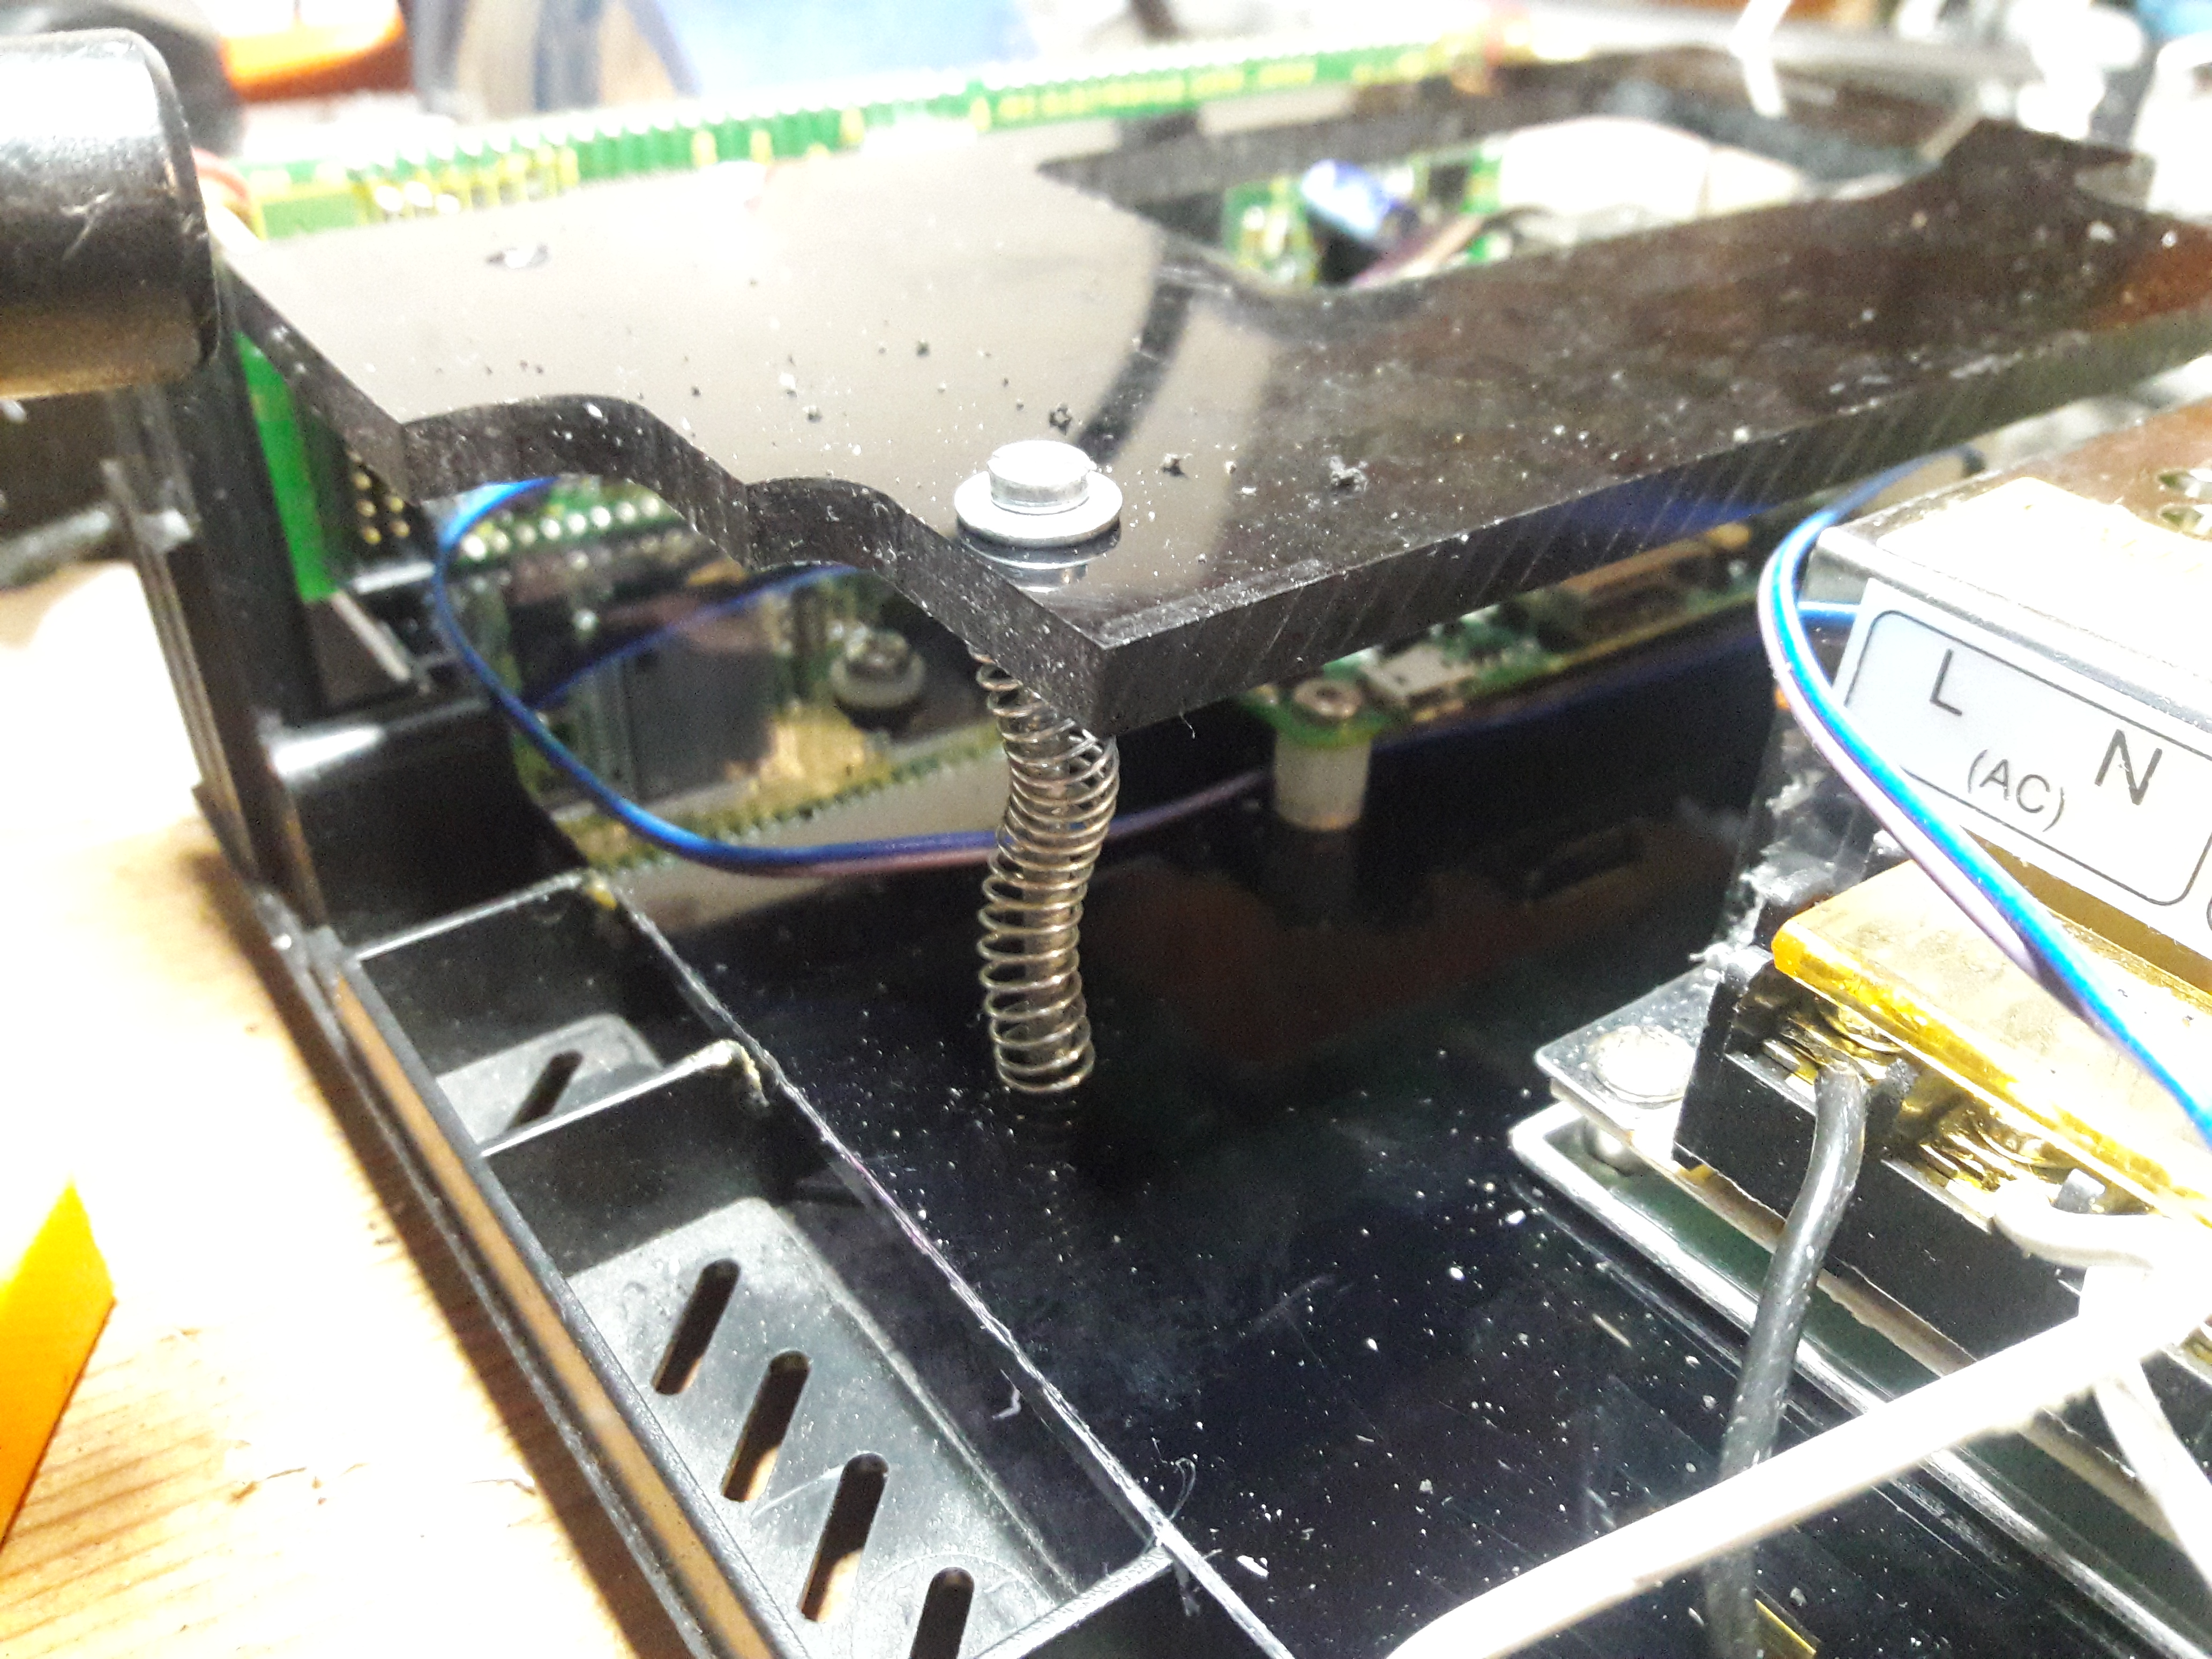
Once mounted as shown below, the VFD was attached to the top sheet, which itself was attached to the bottom sheet with a single spring loaded screw. This allowed for fine tuning the display orientation along the horizontal plane. The VFD is able pivot up and down, and by turning the screw you can set it in the ideal position for visibility.
And everying in place and cleaned up with the heat sink attached. There is good clearance so there should be no impact on airflow and cooling with this set up.
With all this complete, the system was re-assembled and tested. I am happy to report that everything works flawlessly, and after a couple of weeks of testing, it was moved to sit on the top of the Hi-Fi:
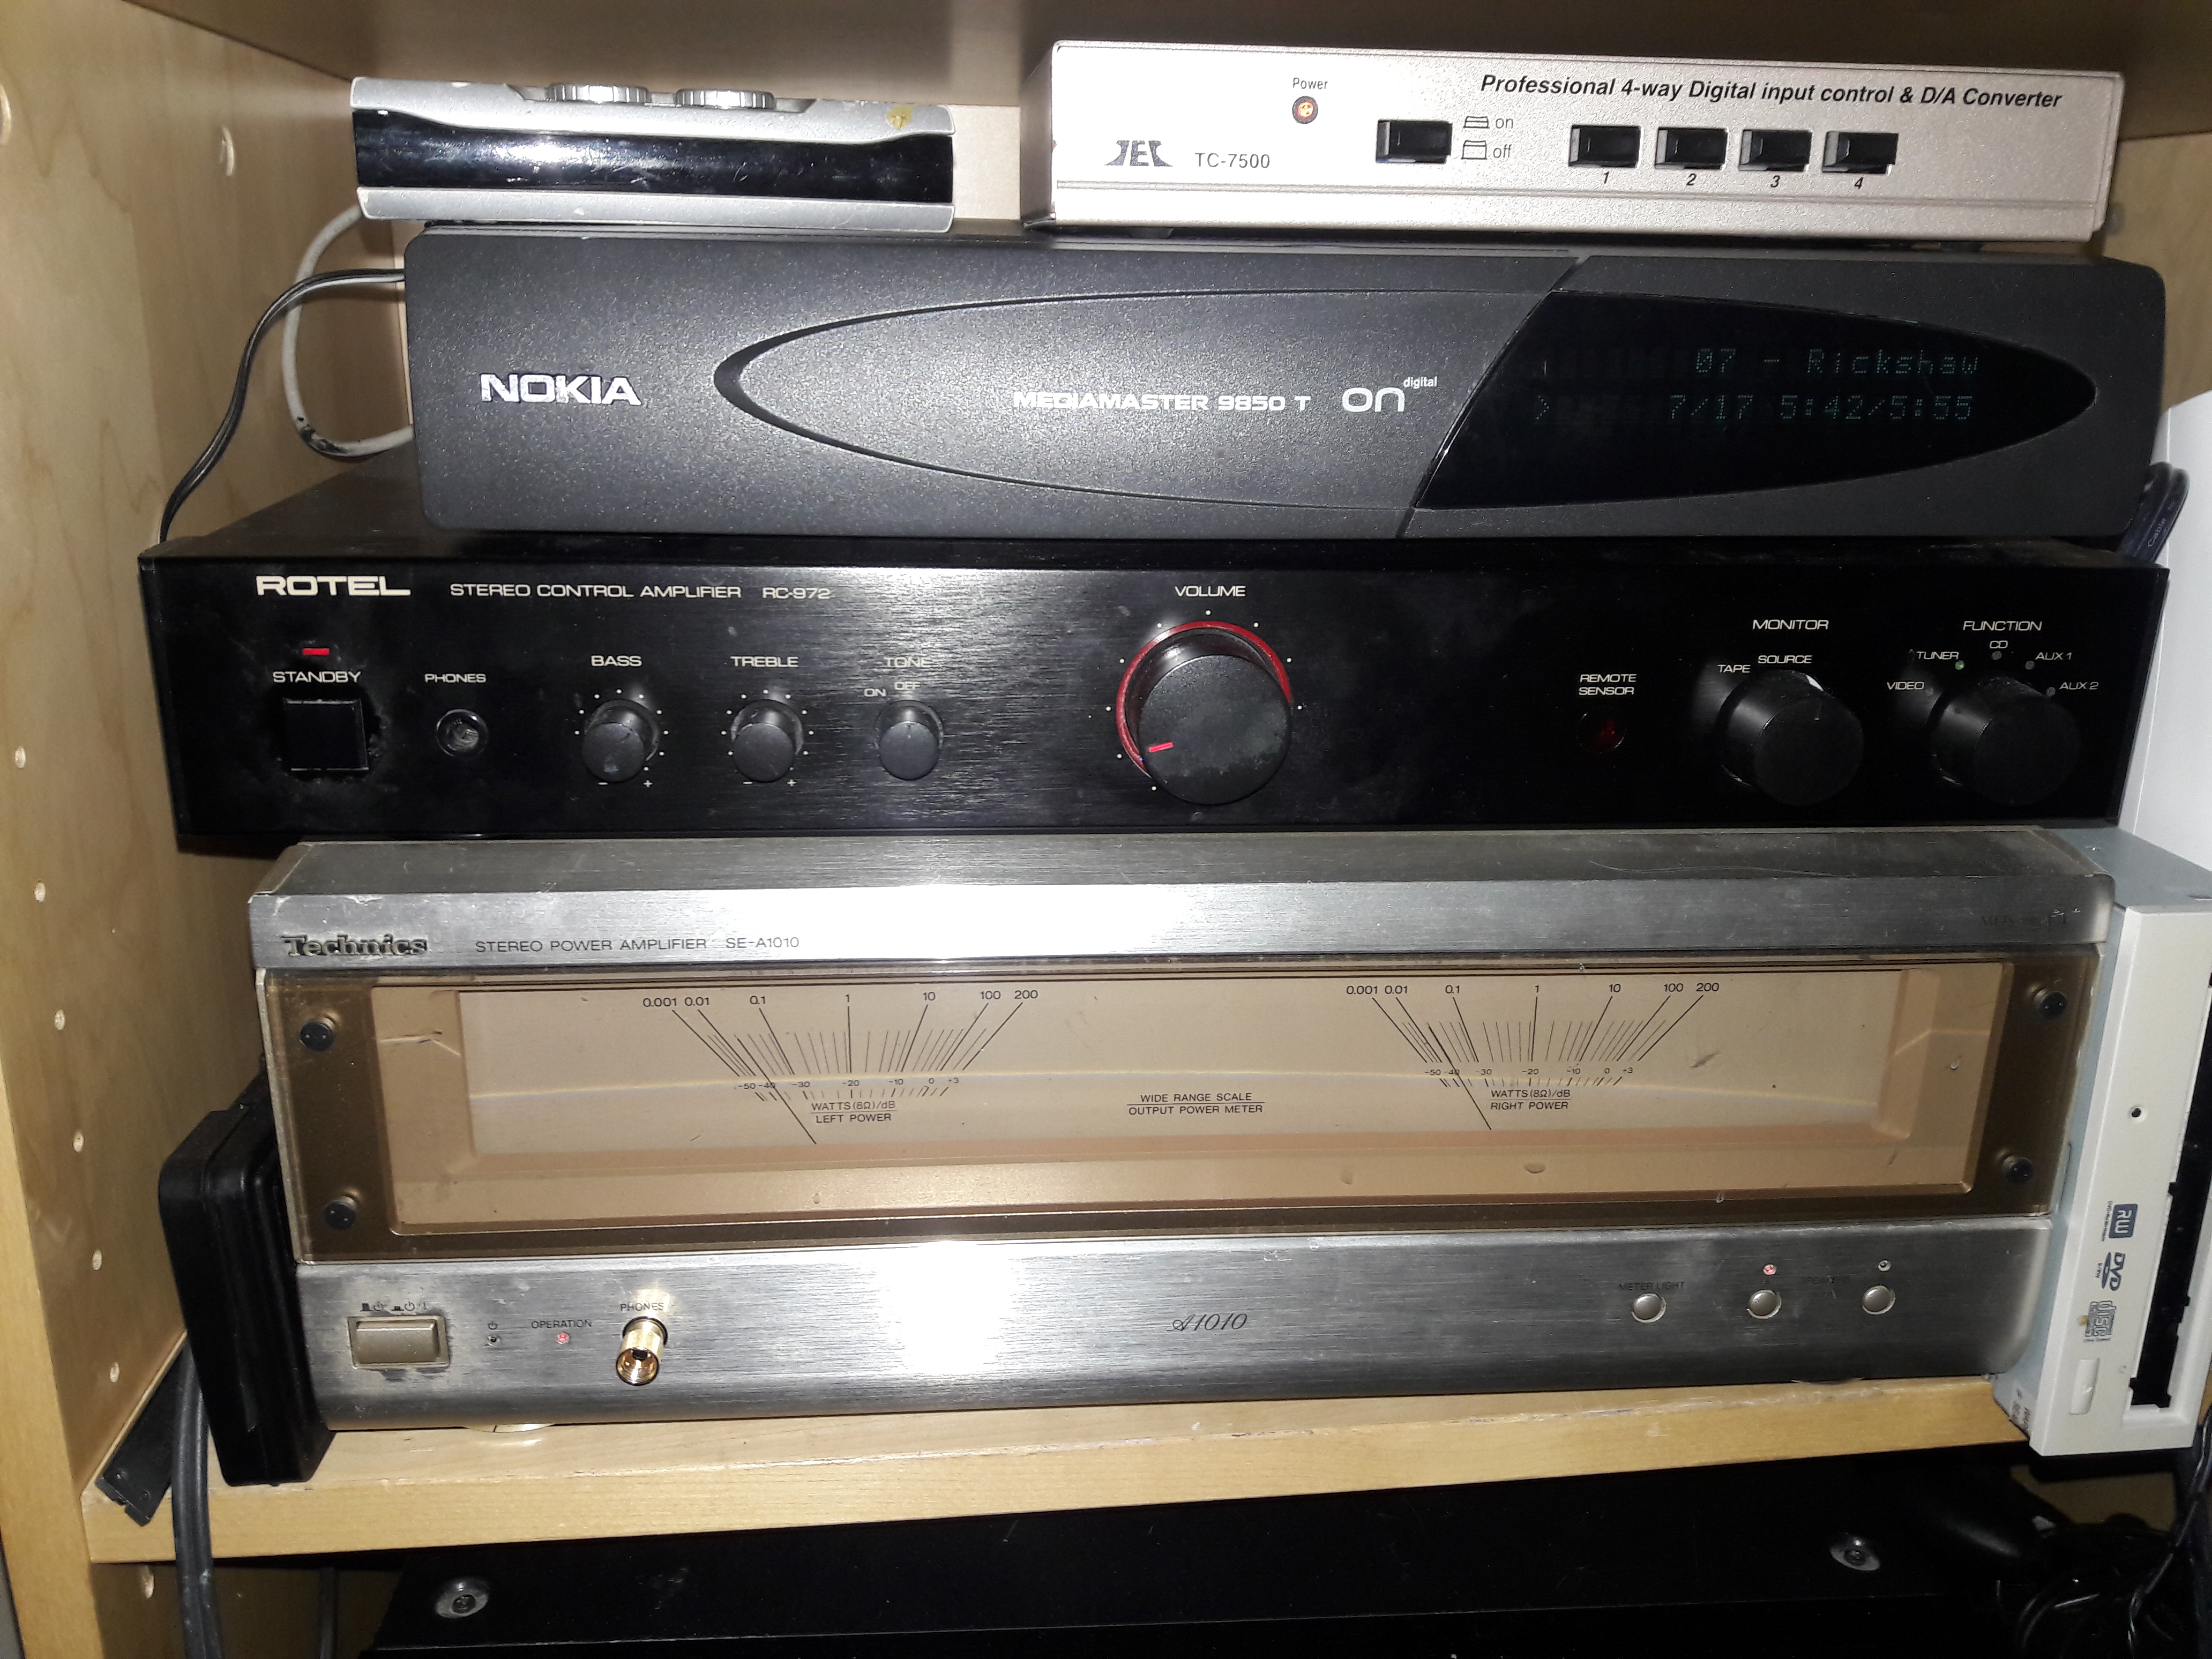
Top left is the Sound blaster USB sound card, and to the right of it is my DAC. At the moment I use the analogue of the sound card but it supports SPDIF out so in future I can connect it to the DAC directly. As for the display, the current VFD is laid out as follows:
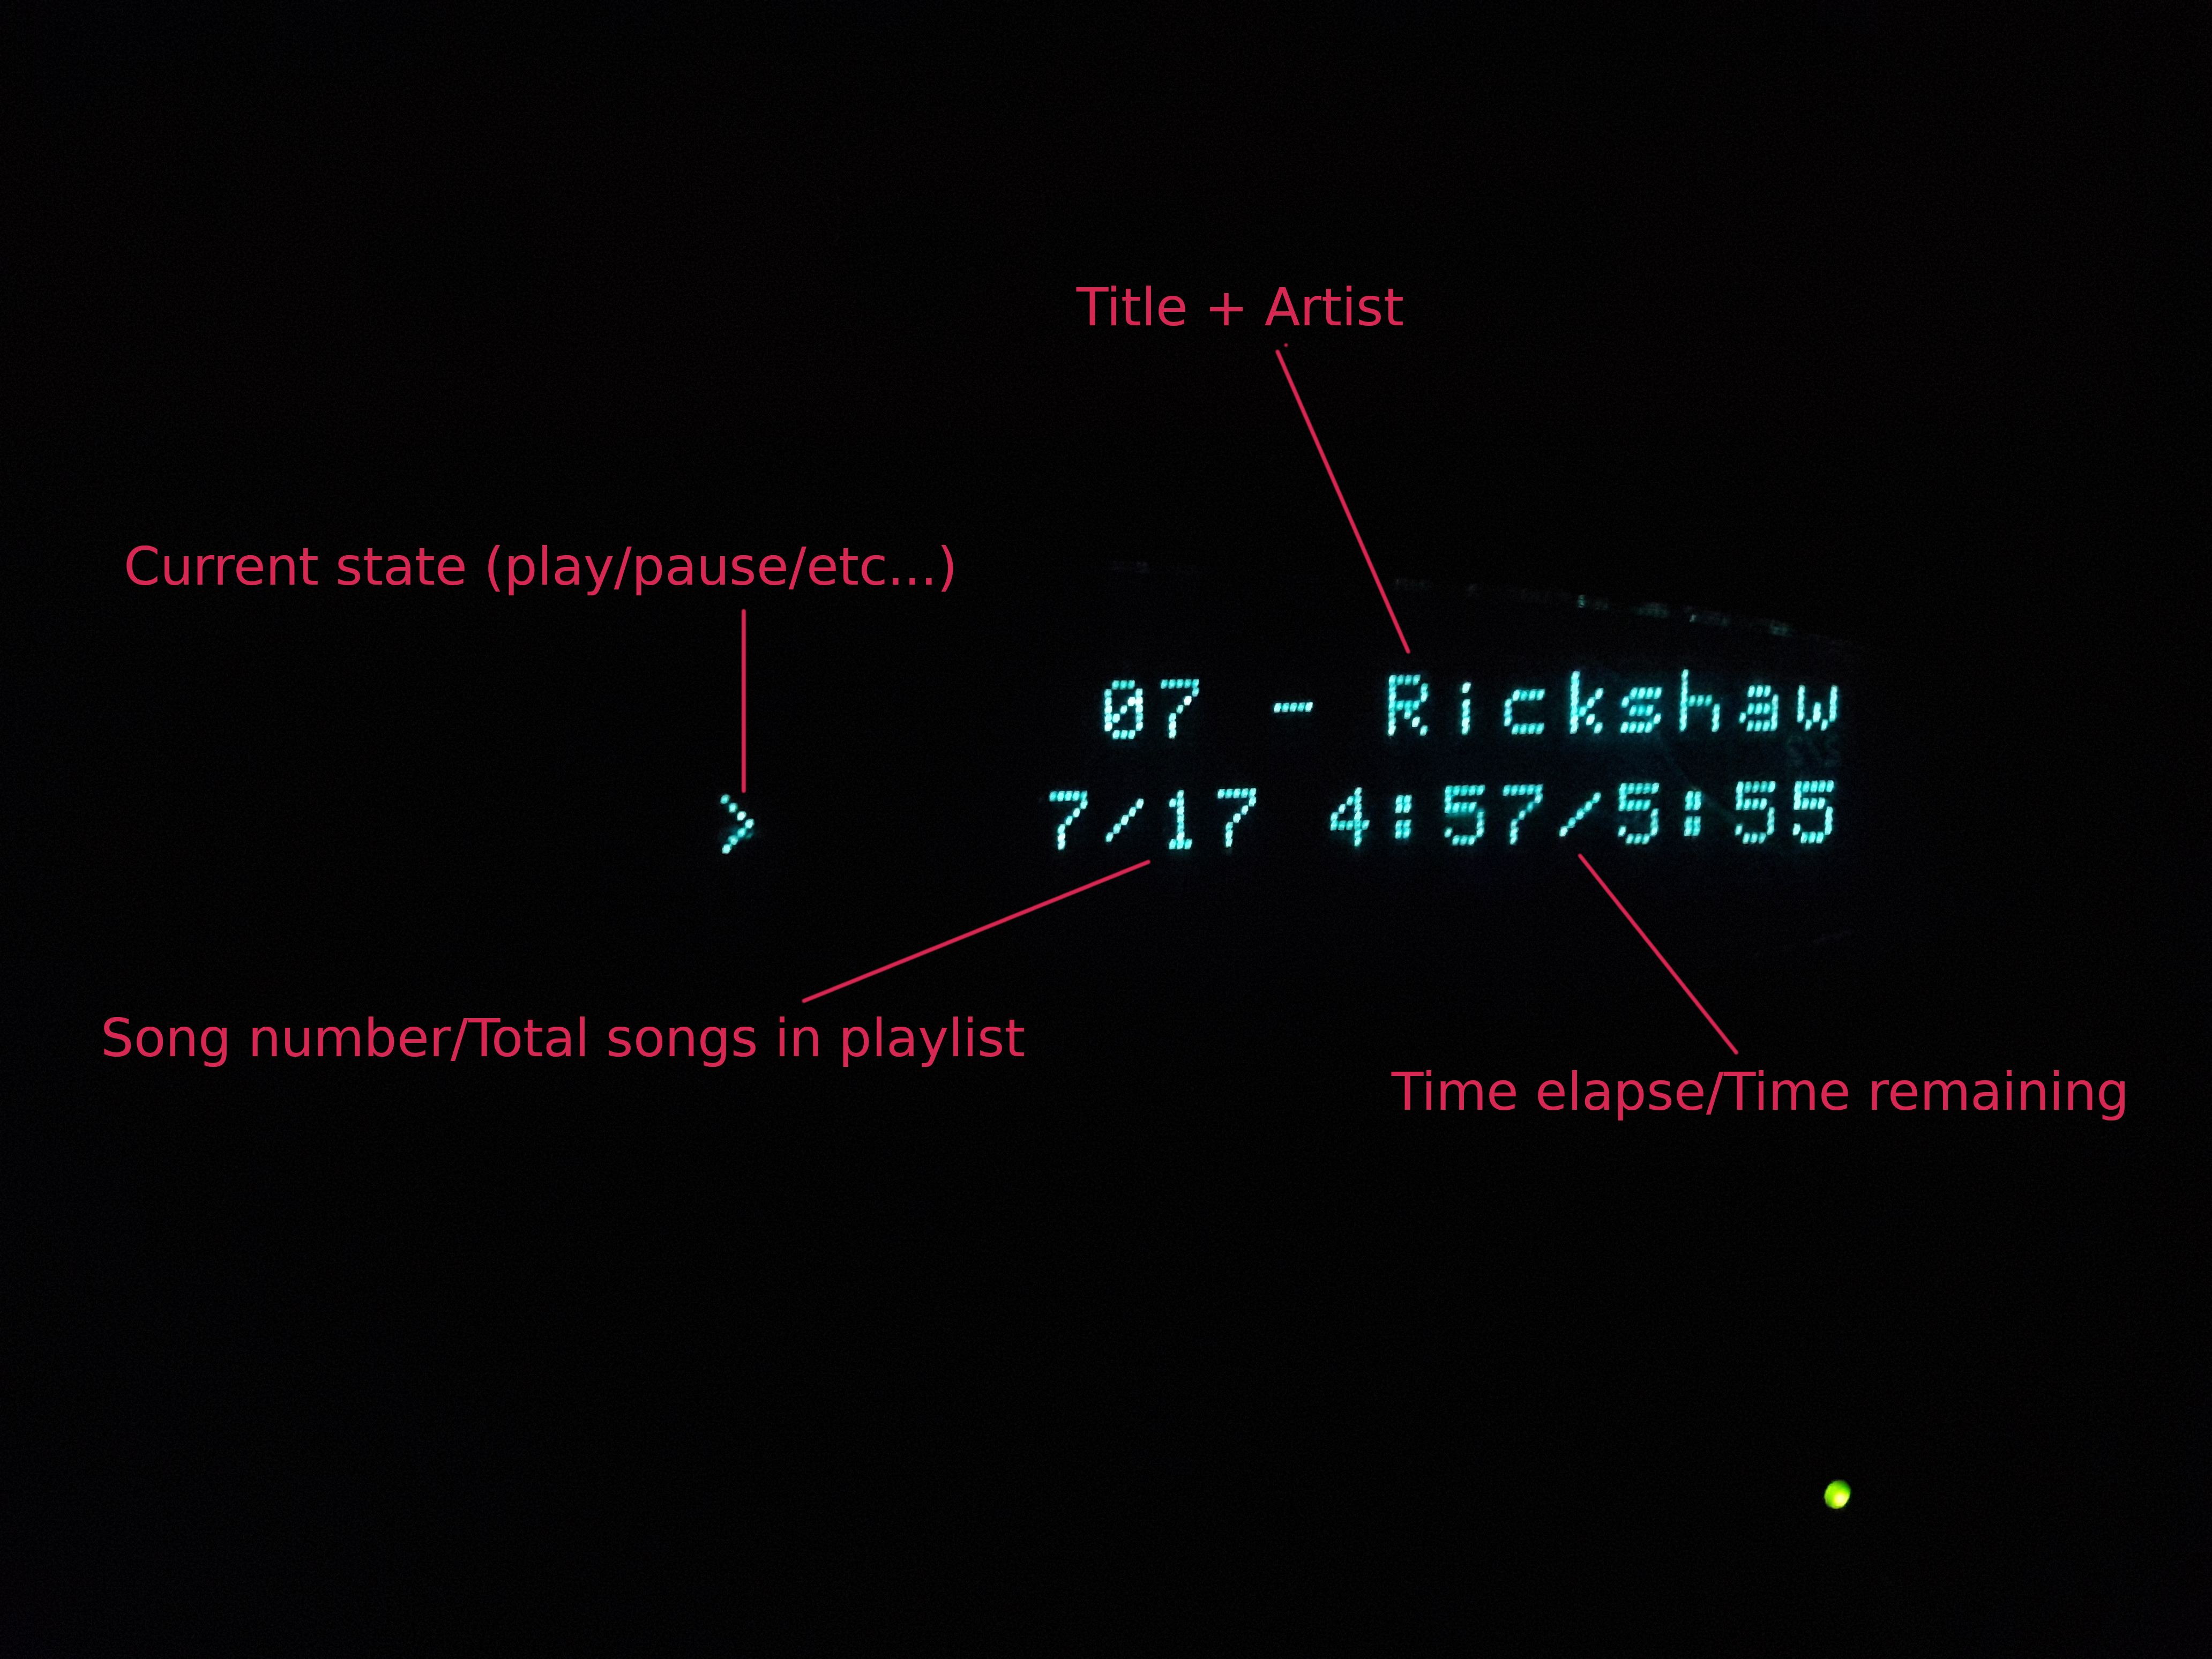
It is relatively simple, allows for long elapsed times and playlists and conveys the information needed. The top line was designed to scroll forwards/backwards if the line is longer than the VFD (sounds simple, but it actually took a lot of racking of the brain when I wrote the code for this part).
With that, I've done all I wanted to do with this project. I will now make use of the system and see how things progress.
Update: February 2022
System has worked flawlessly over the last couple of years. During that time I found out that my internet radio app, "RadioDroid" supports mpd! This means that I can use it to play internet radio streams on my media player as well on my phone. It really is well integrated now.
In addition to the "remote control" phone, I also have both apps on my main phone. Coupled with PC based mpd clients I know multiple different controls simultaneously, no more having to "find the remote".
However two issues were discovered. First the PSU has gotten noisy as time has passed. I think one of the inductors has started buzzing. The system still works but it is too noisy to be in my living room, so after another rummage in my junk box I found an old PSU from a USB hub, 3A at 5V, which should be good enough in the interim:

In the photo above you can see it mounted where the old PSU was. The plug was removed and replaced with connectors to the back of the case. I also took the advantage of having the system apart and I replaced the external sound card with a new internal USB->SPDIF card which is mounted to the rear of the case as well.
From now on the system will play through my standalone DAC. That is likely to provide the best quality of the options available to me, plus I don't have to worry about clean and filtered power supplies or EMF isolation in order to minimise noise entering the analogue audio stream. The system can be pure digital and the analogue is handled by the DAC which is designed for it.
The second issue I discovered is that the underside of the Nokia case had scratched the top of my control amplifier. This is a good demonstration of why Hi-Fi separates systems come with feet. I could not fit proper Hi-fi feet to this case, but I found some other rubber feet that I attached which at least prevent any further damage.
Towards the rear of the photo you can see the CD-ROM drive. I have not mentioned it much so far because nothing has been done with it. It is a laptop CD-ROM drive in a USB->IDE external case. It is connected to the pi, but I have done no work on integrating it into the system. Since I built this system I have not had the need to use a single CD with it. I can play my entire FLAC/MP3/etc... collection through streaming It doesn't help that mpd is very clunky when it comes to supporting audio CDs, involving trying to get digital audio extraction to work and then having to add tracks as songs in the playlist. It would take a lot of work to get it working smoothly. Even for CD's with compressed audio on them, getting Linux to auto-mount a data CD and auto-add it to mpd would require custom code, which I am not sure is worth it unless I will use the feature often.
Either way, that is it for this update, lets see how long until the next one :-)
December 2023
First update. System is working fine, but I felt like I would like some more information displayed. Therefore I decided to replace the 24x2 VFD with a 20x4 VFD. This VFD not only has more cells spread across four lines, it also has physically larger cells so you can more easily read it from a distance.
First work was to find a way to fit it in the case. This was easier said than done, because the VFD itself is physically larger. I had to cut a slot in the bottom plastic in order for it to fit. This is not visible when it is running so it is ok. It also has the benefit of fixing the VFD in place, so I no longer needed the plexiglass top to align it. The downside is that I lost the screw and spring adjustment up/down for the VFD, and due to the larger size the VFD sits farther away from the front panel. This means the VFD is more deep set, reducing the viewing angle.
The second thing I discovered after installation is that while both these VFDs are Noritake, they have different features. The 24x2 had the ability to software "power off" the display. The 20x4 does not. This means it is constantly powered on even when it is not displaying anything and the device is sleeping. I noticed this at night, because you can see the horizontal emission wires glowing in the dark.
I didn't like this both for the wear it would put on the VFD and the waste of energy it represented. So I decided to make my own software power control by inserting a transistor between the VFD and GND and wiring it to one of the pins of the Raspberry pi. Then I started writing a Perl program to be able to switch the display on and off.
Having done the above I just carried on implementing more and more in Perl, until I decided to re-write the entire display logic, moving from C to Perl. The reasoning for this is simple. The C code is very inflexible but very efficient with resources. We had to do this because the C version of this software ran on a first generation pi with 256MB of RAM and one core.
The side effect of this efficiency is inflexibility. Adding features or making major changes requires quite a bit of effort. For example the original code was hard coded for the 24x2 VFD. A lot of things specific to the layout and features were built into the code.
I would have to re-write all of this and now that we have 4 cores and 1GB of RAM the original reason to be extremely resource efficient is gone. In fact we have more CPUs than we need. MPD can have a dedicated core leaving the others mostly idle. So we can afford to dedicate a second core to our software written in a higher level language, while in return getting more power and flexibility in development (makes future changes easier as well).
This re-write progressed nicely. The new system has more varied display abilities, GPIO support for powering the VFD on/off and I wrote an advanced VFD library that allowed me to upload custom icons to the VFD (I've used it for the play/pause icons on the bottom left of the picture below). The layout can be seen in this example of streaming an online ratio station:
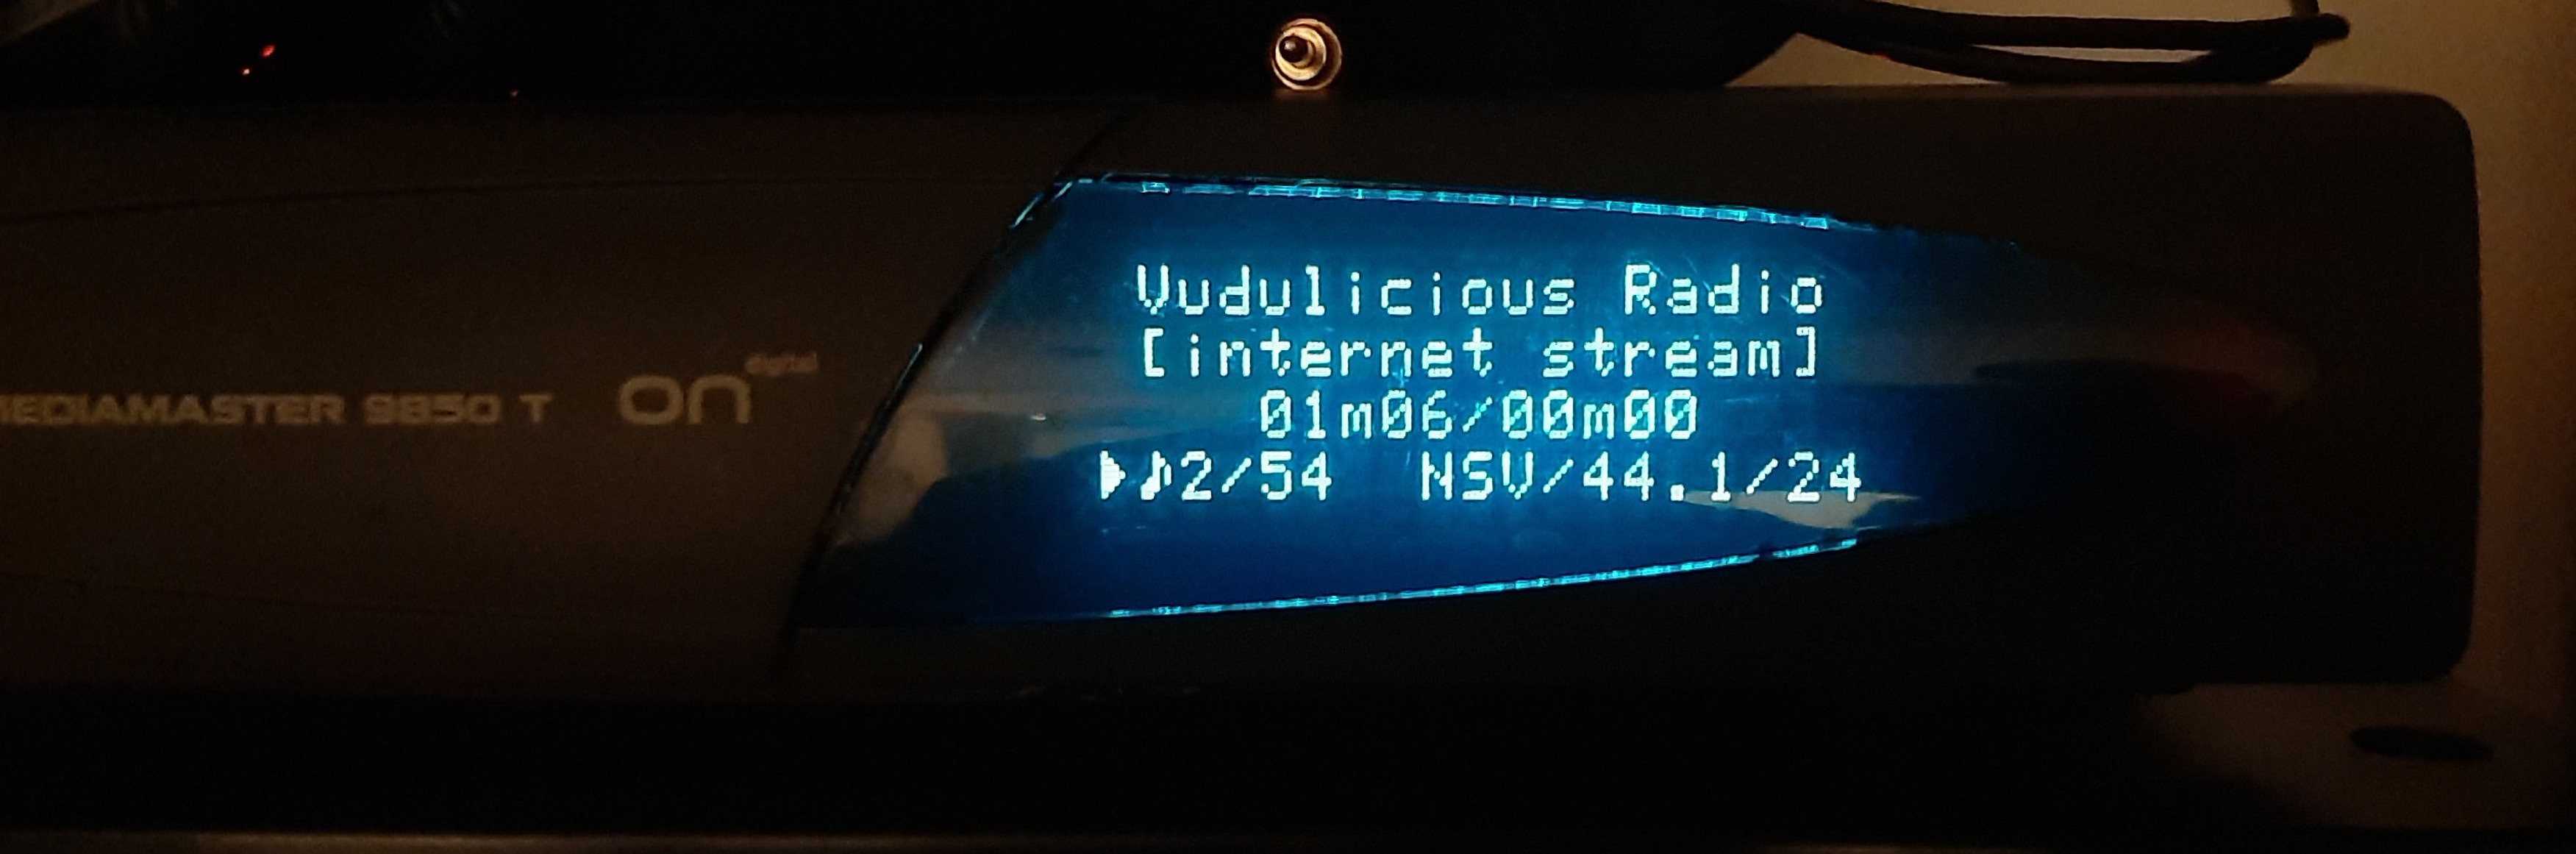
The top two rows are now multifunction. If the current file has metadata tags then the first line is the song Title, second the Artist. If the song is has no metadata then the filename is printed across both lines. If the song is an internet stream the first row is the stream name, the second row shows "[internet stream]" as shown in the example photo above.
The third line shows the current elapsed/total time (00m00 in the case of streams), while the fourth is the status line. We use the leftmost icon to indicate play/pause/stop, the field next to the note icon is the songs playlist position/playlist total, and the far right shows us song status in the format "song_format/sample rate/bits per channel".
Things to do in future
I would like to move the VFD closer to the front panel so it is not so deep set. In its current position on my hi-fi deck the VFD is mostly at eye level so it is perfectly readable. However at other angles you can't see the display very well.
January 2024
New update. The second PSU has ceased working. No buzzing or similar symptoms, just seems to have died quietly at some point since I last listened to a stream. As I have not implemented CD support and I managed to get my old Denon CD deck to work, I decided to remove the CD-ROM from the system. This reduces the power requirements to the point where I can actually run this player through the raspberry pi USB connector. Therefore now I have a USB cable going to a spare mobile phone charger to power the system.
It will be interesting to see how long this lasts before the charger fails. Perhaps without the extra power draw of the CD-ROM it will last longer, and if not at least replacement is easy. I have a box of old USB phone chargers sitting idle.
With the removal of the CD-ROM and PSU, this makes most of the current case empty. Due to this and the deep set VFD I will think about whether a potentially smaller case would be feasible. I am torn, as I would like to follow the rest of the Hi-Fi design and have the media player 19" wide, at the same time 90% of such a case would be empty which is quite a waste.


